The Modern Language Association (MLA) format is a commonly used style for writing and citing research papers, especially in the humanities and liberal arts If you’re a student or academic required to use MLA format for an essay or thesis, this guide will show you how to set it up correctly in Microsoft Word
While writing a paper, it’s essential to properly format the document and cite sources per MLA guidelines. This lends credibility to your work, allows readers to easily find the referenced sources, and demonstrates your ability to follow scholarly conventions
In this comprehensive tutorial, I’ll walk you through the entire process of using MLA format in Word, from adjusting page margins to creating a works cited page. Follow these simple steps to ensure your papers conform perfectly to MLA style.
Step 1: Change the Font
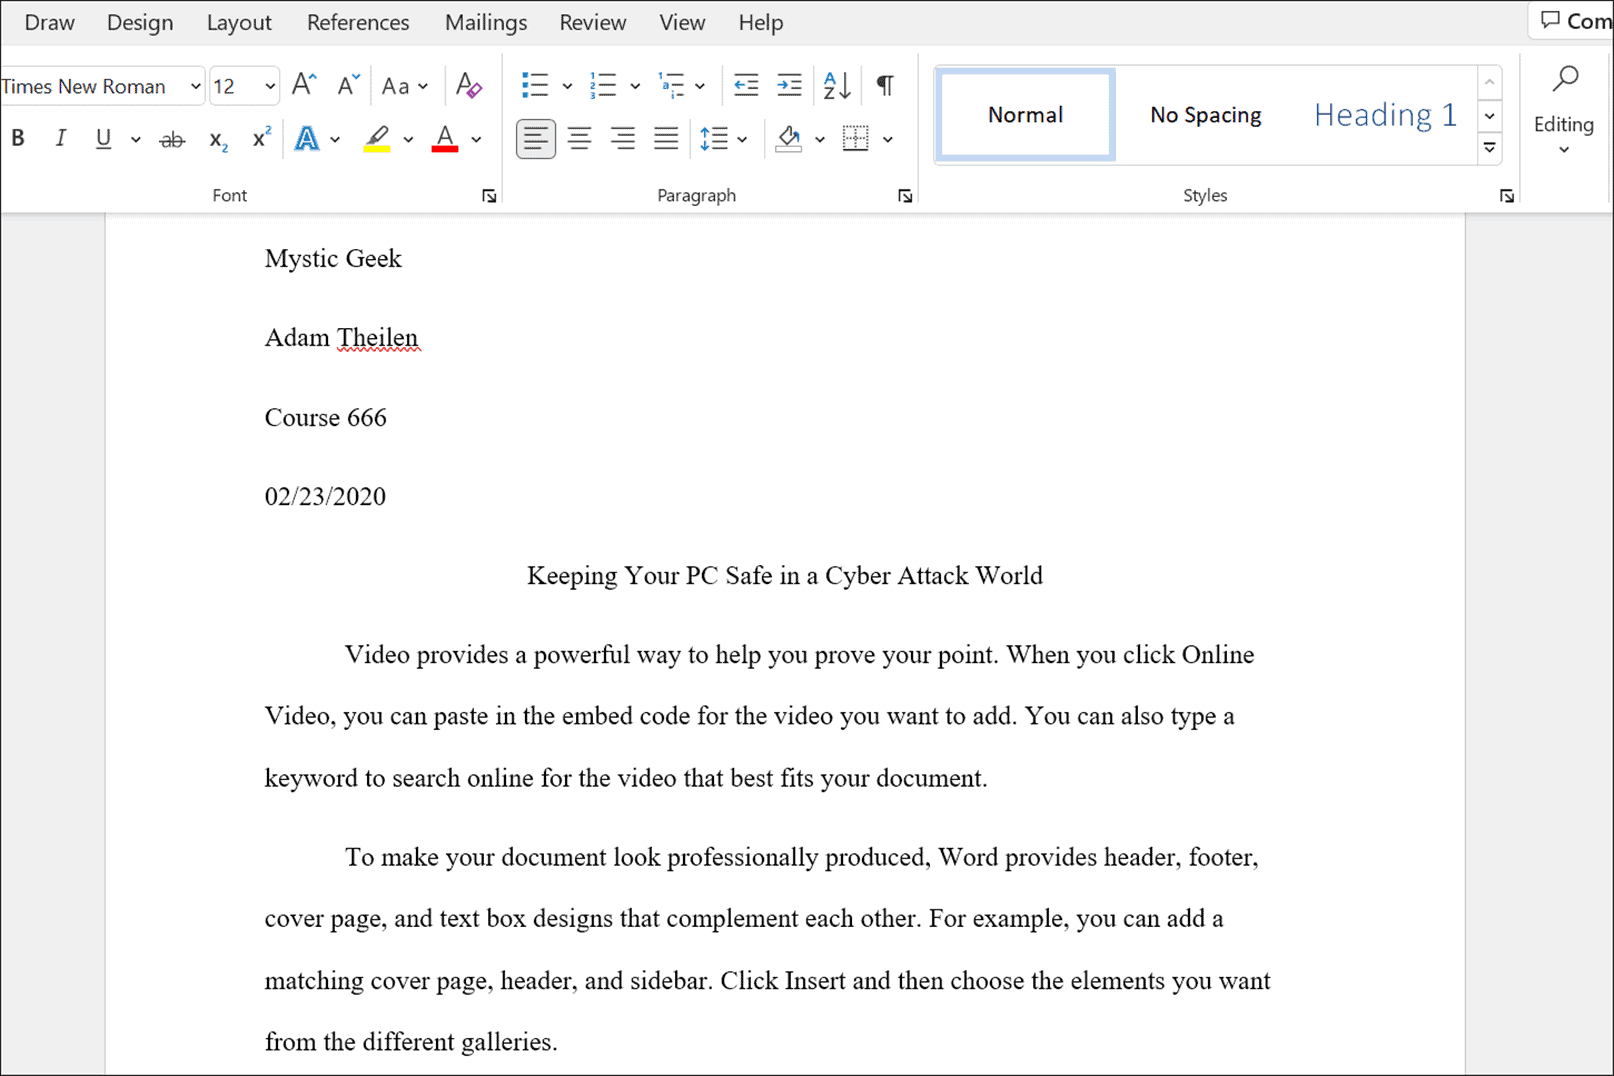
The recommended font for MLA formatted papers is Times New Roman, size 12. To change the font in your Word document:
- Select all text by pressing Ctrl + A on your keyboard
- Go to the Home tab
- Open the Font box and choose ‘Times New Roman’ with 12 pt size
Using the standard MLA font and size allows easy readability.
Step 2: Adjust the Margins
As per MLA style, standard margins are:
- 1 inch on the top and bottom
- 1 inch on the left and right
To change margins in Word:
- Go to the Layout tab
- Click on Margins
- Select ‘Normal’ which sets 1 inch margins all around
The 1 inch margin aids readability and provides space for comments or citations.
Step 3: Set Line Spacing
The standard line spacing for the body text in MLA format is double-spaced. To quickly set this in Word:
- Select all text by pressing Ctrl + A
- Go to Home tab
- Open the Paragraph box and choose ‘2.0’ line spacing
Double spacing enhances readability and allows space for reviewer comments and edits.
Step 4: Add a Header
Per MLA style, a header with your last name and page number should appear at the top right corner of each page. To create this:
- Go to the Insert tab and click on Header
- Select the ‘Blank’ header option
- Type your last name on the left side
- Insert the page number on the right (Insert > Page Number)
This header helps identify pages that may get separated from your printed paper.
Step 5: Create a Title Page
Your research paper should begin with a separate MLA-style title page instead of having a title on the first page of the main text. To make one:
- Insert a page break after the header
- Center align the title of your paper on the new page
- Hit enter a few times and center align your full name
- On the next line, center align the professor name, course name, and date
A properly formatted title page helps instructors assess compliance with MLA standards.
Step 6: Add Headings
If your paper has sections, format the headings per MLA guidelines:
- Level 1 headings should be center aligned, bold and title case
- Level 2 headings should be flush left, bold and title case
- Level 3 headings should be flush left, bold, italicized and title case
Proper headings help organize content and guide the reader.
Step 7: Include a Title
Center align the title of your paper on the first page of the text (after the title page). Do not bold, italicize, underline or put the title in quotation marks. Capitalize major words in the title.
A correctly formatted title introduces the subject matter to readers.
Step 8: Indent Paragraphs
The first line of each paragraph in the body text should be indented 0.5 inches. To set this in Word:
- Go to the Home tab
- Locate the Paragraph box
- Under Indentation, enter 0.5 inches for the Left value
MLA requires indented paragraphs to clearly distinguish between each one.
Step 9: Apply Double Spacing
Double space the entire paper including the title page, main text and works cited page. There should be no extra spaces between paragraphs or headings.
Consistent double spacing and zero extra spacing improve readability.
Step 10: Format In-Text Citations
When citing a source in the text body, follow this MLA format:
- Enclose direct quotes in quotation marks and include the page number
- For paraphrasing, just include the author last name and page number in brackets
Cite sources using the last name of the author and relevant page number, e.g. (Belcher 32).
Step 11: Create a Works Cited Page
At the end of your paper, add a separate page for the works cited list. Center align the title “Works Cited” at the top. Then, list each cited source in alphabetical order formatted per MLA style.
Carefully formatting each entry in the bibliography demonstrates attention to detail and aids the reader in locating sources.
Step 12: Apply Hanging Indents
Apply hanging indents for each source in the works cited page. To do this in Word:
- Highlight the citations
- Go to the Home tab
- Locate the Paragraph box
- Under Indentation, enter 0.5 inches for Left and -0.5 inches for Hanging
Hanging indents make the works cited page more scannable and readable.
Formatting Tips for Common MLA Elements
Here are some key formatting guidelines for other common elements of MLA style papers:
-
Tables: Center align the table title above the table. Align text to the left within table cells.
-
Figures: Center align the figure caption below the image/chart. Use italics for the caption and end with a period.
-
Block quotes: Indent 0.5 inches and reduce font size to 11 if quote exceeds 4 lines. Do not use quotation marks.
-
Footnotes: Insert footnotes using Word’s footnote tool. They should be single spaced with 10 pt font size.
Avoiding Common MLA Format Mistakes
Here are some frequent MLA formatting errors to avoid in your paper:
- Using a different font like Arial or Calibri instead of Times New Roman
- Using 1.15 or 1.5 line spacing instead of double spacing
- Including only the page number or title in the header
- Putting the paper title on the same page as the opening text
- Centering report titles instead of title case capitalization
- Using endnotes instead of footnotes
- Having 0 inches for first-line paragraph indents
- Using improper punctuation, spaces or alignment in citations
Carefully proofread your document to ensure correct MLA compliance before submission.
Tips forMastering MLA Style
Here are some top tips to help you efficiently master MLA formatting:
- Use the official MLA style handbook as a reference guide
- Review instructor samples and templates if available
- Leverage Word’s styles feature to save custom MLA settings
- Take advantage of citation tools like Zotero for automatic bibliography creation
- Use the search and replace tool to quickly fix formatting issues
- Ask your instructor or librarian for clarification if needed
- Educate yourself on recent MLA updates
With practice and attention to detail, applying proper MLA formatting in Word will become second nature.
Key Takeaways
MLA format is a key scholarly style that demonstrates your ability to produce properly structured, well-cited papers. By following the step-by-step instructions in this guide and avoiding common errors, you can easily format your Word documents to conform perfectly with MLA style.
Mastering MLA will boost your confidence in writing discipline-specific papers and ensure you submit professionally formatted work every time. Consistently applying the principles here will set you up for continued success with writing academically.
Formatting a Works Cited in Word 2013/2016
Use the following directions to format your Works Cited document in MLA format. Also, check out our MLA 9th ed. sample paper. You can also review section 1.6: Placement of the List of Works Cited in the online MLA Handbook.
- After completing your paper, click the “Insert” tab and choose “Blank Page” to add a new page to your document. Your header with your last name and page number should appear in the top right corner when you insert the new page

- Click the “Home” tab, then click the “Justify Center” icon. This will center your title.
- Type in your title, Works Cited. Your title should be in size 12 Times New Roman font.
- Hit “Enter” on your keyboard to start a new line. Then, hit the “Justify Left” icon to move the cursor back to the left.
- Type in your full MLA Citations for your sources. Remember, your Works Cited page should still be double-spaced!
- All Works Cited entries that are longer than a single line must include a Hanging Indent for second (and so forth) line(s).
- Choose the line you wish to indent. Move your cursor to the line you wish to indent.
- Hit CTRL T (or CMD T on a Mac) on your keyboard.
- Repeat (if necessary) for your third line.
MLA Formatting for Word 2013/2016
- On the “Home” tab, select “Times New Roman” from the font list and change size to 12.

- On the “Home” tab, click the arrow that expands “Paragraph Settings.” Under Spacing, choose Double and make sure “Before” and “After” are set to 0pt.

- On the “Page Layout” tab, click “Margins”, Select “Normal” (1″ on all sides).
- Click on the “Insert” tab, then click on “Page Number”. Choose “Top of Page” and then “Plain Number 3”.

- Type your last name and hit the space bar once. Highlight the text, click the “Home” tab, and change font to “Times New Roman”, 12. Then double click below dotted line to begin typing your paper.

- Type the following, each on a separate line: Your name, instructor’s name, the course number (i.e.Eng. 101), and the date (Day Month Year: 3 Aug. 2009).

- Hit “Enter” key to move down to a new line. To center your title, click the “Center” icon in the Paragraph section and type the title of your paper.

- To begin your paper, hit “Enter” key to move down to a new line. Click the “Left” icon in the Paragraph section. Hit “Tab” key to indent and start typing. *Remember to hit the “Tab” key each time you begin a new paragraph.


How to set up MLA Format Paper with Works Cited Page in Microsoft Word (latest)
FAQ
What is an MLA format example?
|
Full reference structure:
|
Author’s Last Name, First Name. Title. Publisher, Year published.
|
|
|
Example:
|
Baron, Dennis. What’s Your Pronoun? Beyond He & She. Liveright, 2020.
|
|
|
In-text structures:
|
Author’s Last Name…(page number).
|
(Author’s Last Name page number).
|
|
Example:
|
Baron…(82).
|
(Baron 82).
|
How do I write a MLA format essay?
Open a new blank Microsoft Word document. Click File from the ribbon. Type MLA format and click the MLA Style Paper template in the Search field. A generic MLA formatted essay paper will appear, and you can type in the data you need for your article. Add your name, course instructor (if necessary), course number, and date.
Where can I find MLA format?
your formatting in a read-only file saved to your computer. Purdue Online Writing Lab. “MLA General Format.” Purdue Online Writing Lab, Purdue University, owl.purdue.edu/owl/research_and_citation/mla_ style/mla_formatting_and_style_guide/mla_gene ral_format.html.
How do I change the spacing on an MLA formatted paper?
An MLA formatted paper has double-spacing across all pages. You can adjust the spacing settings by opening the “Home” tab and going to the “Paragraph” group. Find the icon that looks like lines of text with up and down arrows next to them. Click this “Line and Paragraph Spacing” icon and select “2.0.”
