Webex Meetings is one of the most popular video conferencing platforms used by businesses and teams worldwide. With Webex you can set up virtual meetings to collaborate face-to-face share screens, present slides, and more.
However if you’re new to Webex, learning how to schedule and start meetings can seem daunting at first. Not to worry! In this step-by-step guide, I’ll walk through the entire process of setting up and starting a Webex meeting from start to finish.
By the end, you’ll have the knowledge to quickly and easily begin hosting your own Webex meetings for sales presentations, team huddles, client calls, and any other virtual gathering. Let’s dive in!
Step 1: Sign Up for a Webex Account
First things first – in order to set up Webex meetings, you need a Webex account. Here’s how to sign up:
- Go to webex.com and click on “Sign Up” in the top right corner.
- Enter your name, email address, and create a password.
- Optionally, enter your company name if you’re signing up for a business account.
- Agree to the Webex terms of service and privacy policy.
- Click “Sign Up” and confirm your account via email.
Signing up is quick, easy, and free. Webex offers a basic free plan as well as paid plans with more features for businesses and larger teams. But the free version is enough to get started hosting meetings.
Step 2: Install the Desktop App
For the full Webex meeting experience, you’ll want to install the Webex Meetings desktop app on your computer, available for both Windows and Mac.
Here’s how to download and install it:
- Go to webex.com/downloads and click “Meetings” under Desktop Apps.
- Click the download button for Windows or Mac.
- Open the downloaded file and follow the prompts to install Webex Meetings.
- Once installed, open the app and log in using your Webex credentials.
The desktop app provides the best audio, video, and screen sharing quality. Make sure to install it on any computer where you plan to host meetings.
Step 3: Schedule a Meeting
Now comes the fun part – scheduling your first meeting! Follow these steps:
- Open the Webex Meetings desktop app and click on Schedule Meeting at the top.
- Set the meeting details including title, date/time, estimated duration, and if it’s recurring.
- Enable video so participants can join with video.
- Invite attendees by adding emails and optional messages.
- Click Schedule to confirm the meeting time.
Webex will automatically generate a meeting link that you can copy and send to attendees. The meeting will now appear in your Webex calendar as well.
Step 4: Customize Meeting Settings
Before starting your Webex meeting, it’s a good idea to review the meeting settings and make any customizations. Here are some options to consider:
- Require a password to join for added security.
- Enable mute attendees on entry to minimize background noise.
- Allow attendees to join before host so people can gather ahead of time.
- Automatically record meetings to cloud or local storage.
- Enable chat and customize permissions for attendees.
Take a minute to review the available settings and adjust them to suit your meeting needs. This will provide the best experience for you and your attendees.
Step 5: Start the Webex Meeting
It’s go time! When you’re ready to start the meeting, follow these simple steps:
- Open the Webex Meetings desktop app on your computer.
- Locate the meeting in your list and click “Start Meeting”.
- The meeting window will open. Click “Join Meeting”.
- Grant permission to use your camera and microphone if prompted.
- Once connected, click “Invite and Remind” to send reminder emails to attendees.
As the host, the meeting controls will appear at the bottom of your meeting window once you join. You’re now ready to admit attendees as they join and get the meeting started!
Step 6: Share Your Screen
One of the core Webex Meeting features is screen sharing. As host, follow these steps to share your screen with attendees:
- Click the green “Share” button at the bottom of your meeting window.
- Select the desktop or app window you want to share.
- Click “Share”. A blue border will appear around your shared screen.
- To stop sharing, click the red “Stop Sharing” button.
With screen sharing, you can present PowerPoints, documents, webpages, prototypes, and more to your meeting attendees. Experiment with sharing different types of content.
Extra Tips for Webex Meeting Success
Now that you know the basics, here are some extra tips and best practices for Webex meeting success:
-
Test your audio/video – Test your webcam, mic, speakers, and internet connection prior to important meetings.
-
Use headsets – Headsets with microphones reduce background noise and echo for clearer audio.
-
Adjust your lighting – Position a light source in front of you for optimal video lighting.
-
Present with dual monitors – Use one screen for presenting and one for viewing participants.
-
Join early as host – Join at least 5 minutes early to greet participants as they arrive.
-
Mute when not speaking – Mute your mic when not talking to minimize background noise.
-
Engage attendees – Encourage participation by regularly checking the chat and inviting input.
-
Record meetings – Record your sessions to share with absent team members later.
With these tips in mind, you’re ready to become a Webex meeting master! Set aside time to practice so hosting feels natural and intuitive. Over time, you’ll gain confidence using all the Webex features for productive virtual meetings.
End-to-end encryption for Webex App meetings
Meetings associated with a space support end-to-end encryption. For more information on how to encrypt all your meetings by default, see Webex App | Set end-to-end encryption for meetings.
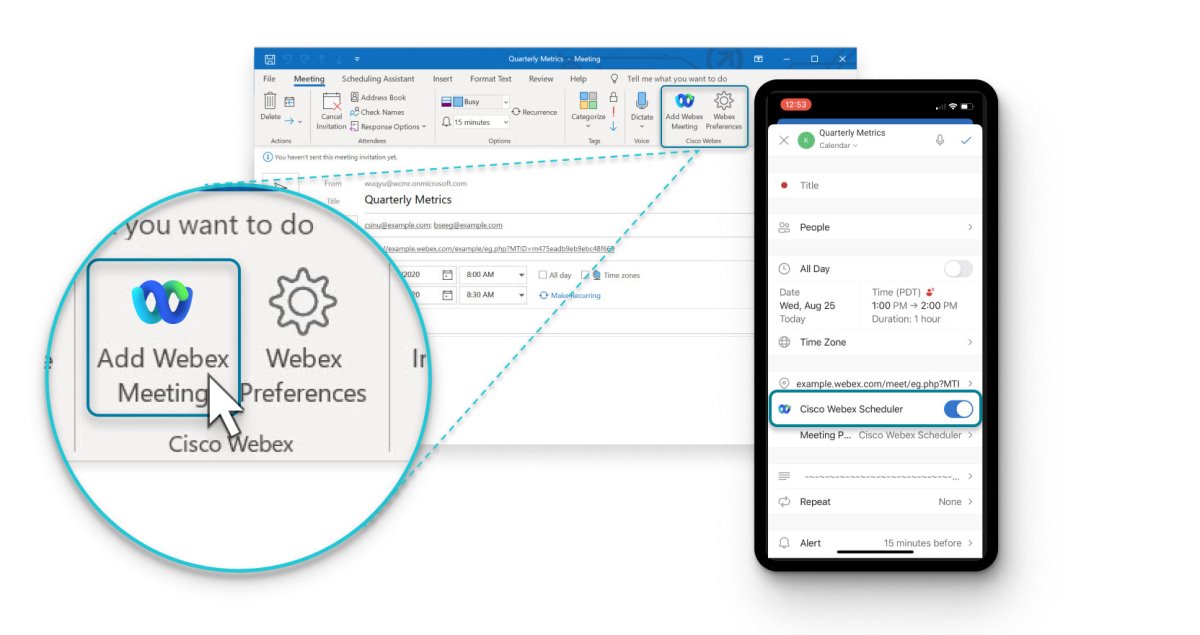
Choose the scheduler that you want to use to schedule meetings. You can schedule meetings from a space using Microsoft Outlook, Google Calendar, or the Webex App scheduler (if your administrator has set up your account with Cisco Webex Hybrid Calendar Service).
If your administrator hasnt set up your account with Hybrid Calendar or youre using a calendar other than Microsoft Outlook or Google Calendar, use the instructions in Other Calendars.
| 1 |
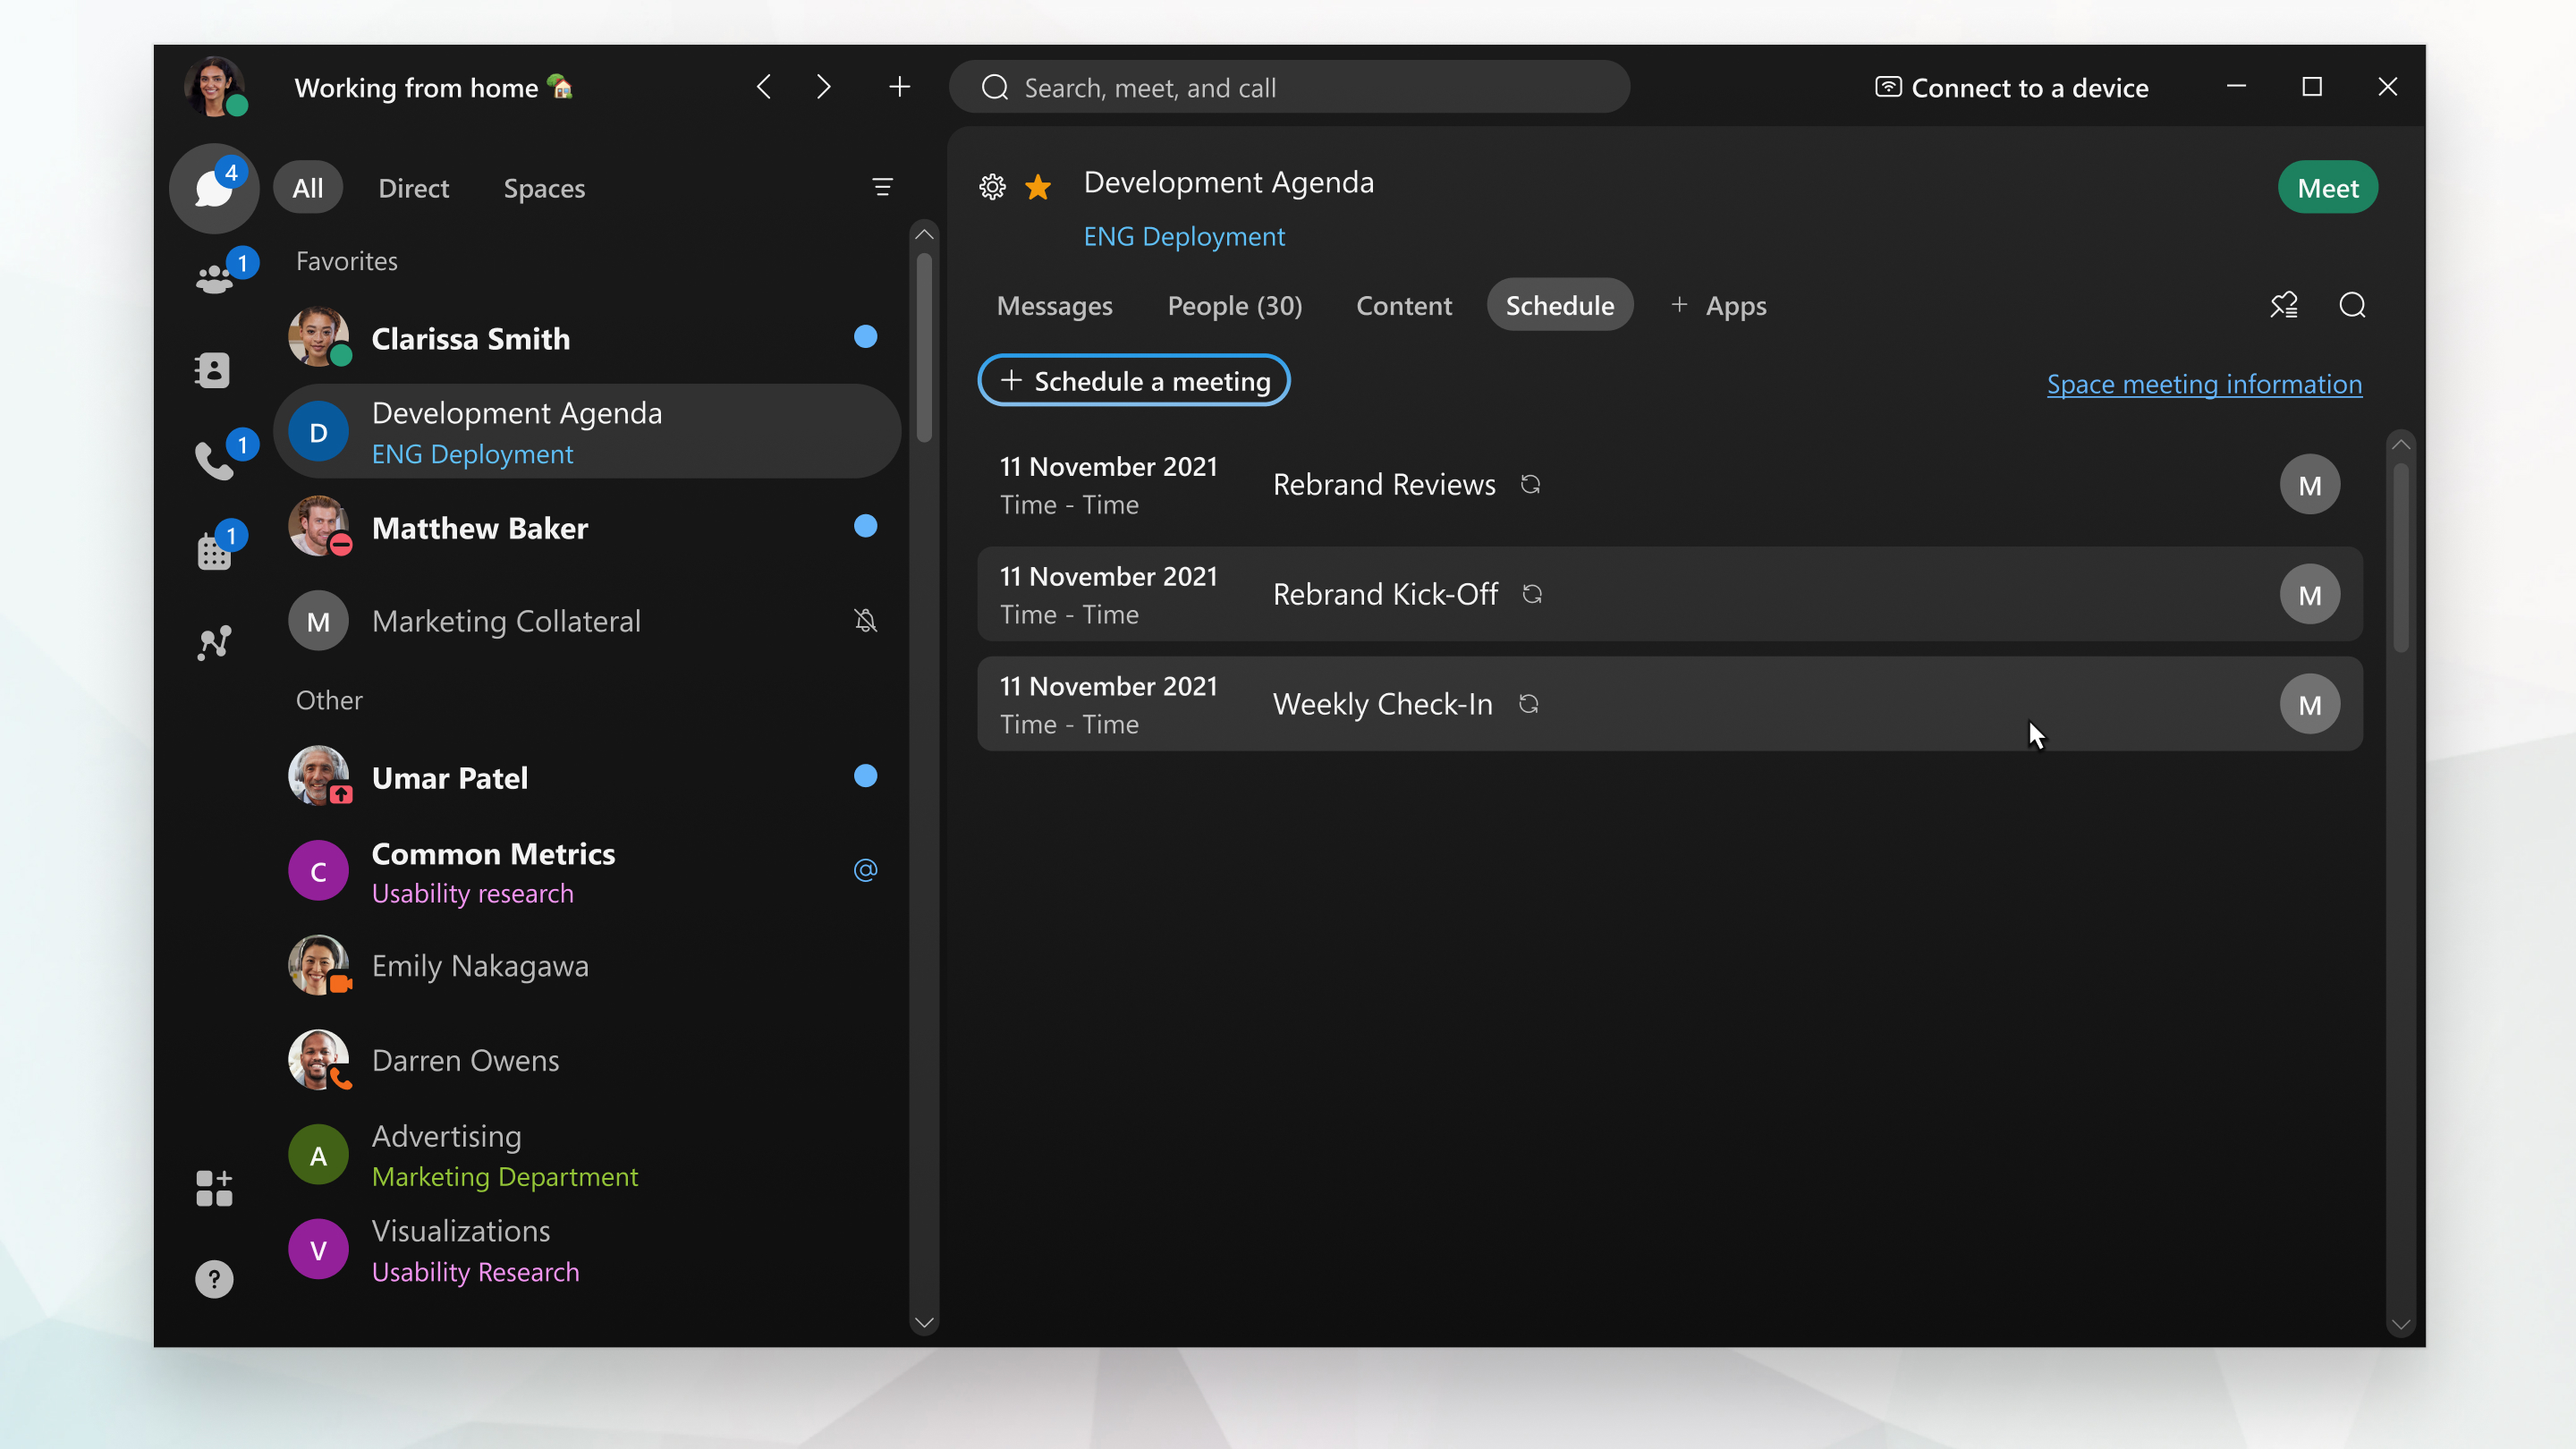
In the space, click Schedule.
|
|
| 2 |
Select Schedule a meeting. Webex App opens a calendar invite in Microsoft Outlook that automatically includes email addresses for everyone in the space, the space name as the subject, and “@webex:space” in the Location field. Depending on your setup, the invite may also include a link to join the meeting, Join by phone options, and a video address so people can join from any standards-based video system. |
|
| 3 |
Specify the date, time, and other details. |
|
| 4 |
Add a Cisco Webex room or desk device by selecting Scheduling Assistant > Add Rooms on Windows or Scheduling or Room Finder and then Add Room on the Mac and then add the room or desk devices you want to include. A Join button appears on the device 5 minutes before the meeting starts.
|
|
| 5 |
Send the meeting invite. |
| 1 |
In the space, click Schedule.
|
|
| 2 |
Select Schedule a meeting. If youre using Google Calendar with Microsoft Outlook, Webex App opens a calendar invite in Microsoft Outlook. Otherwise, it opens Google Calendar using your default browser. The invite has the space name as the meeting subject, “@webex:space” in the Location field, and includes email addresses for people in the space.
|
|
| 3 |
Specify the date, time, and other details. |
|
| 4 |
Add a Cisco Webex room or desk device by selecting Scheduling Assistant > Add Rooms on Windows or Scheduling or Room Finder and then Add Room on the Mac and then add the room or desk devices you want to include. A Join button appears on the device 5 minutes before the meeting starts.
|
|
| 5 |
Send the meeting invite. |
| 1 |
In the space, click Schedule a meeting
|
|
| 2 |
All members of the space are automatically invited to the meeting. Add invitees by typing their name or email address. Remove invitees by hovering over their name and clicking Remove.
|
|
| 3 |
To book a meeting room, go to Rooms and enter the name or location of a meeting room. You see icons next to room names to show their availability. Click on a room name to add it to the meeting invite.
|
|
| 4 |
Click Advanced Settings and choose from the available options:
|
|
| 5 |
Click Schedule. The meeting is added to your calendar. An email invitation is sent to everyone invited to the meeting. |
 , and then enter your meeting info:
What to do next
If you need to make changes, you can update the meeting details or cancel the meeting.
|
Heres where youll find all the meetings that are scheduled in the space. |
| 1 |
In the space, click Schedule.
|
|
| 2 |
Click Space meeting information, select Copy, and then go to your calendar and paste the meeting information into a meeting. Depending on your setup, the meeting information may include a link to join the meeting, Join by phone options, and a video address so people can join from any standards-based video system. |
|
| 3 |
Go back to your Webex App and the Space meeting information view. Next to People, select Copy, and then go to your calendar and paste the email addresses in the To section of the meeting. |
|
| 4 |
Specify the date, time, and other details, and then send the invite. |
How to use Webex Meetings – Tutorial
FAQ
How do I make a Webex meeting?
How do I send a Webex meeting invite?
How to create a meeting room in Webex?
How do I schedule a WebEx Meeting?
Click here: Schedule a Webex Meeting from the Meetings Calendar of the Webex App. Schedule a Meeting on Behalf of a Host If you have a hosting account, you can schedule meetings or training sessions on behalf of someone in your organization. The host must allow you to schedule meetings or sessions on their behalf.
How do I create a WebEx personal room?
1. Go to Webex’s website in a web browser. If you don’t already have an account, click “Start for Free” and follow the instructions to create an account. Otherwise, click “Sign in,” click “Webex Meetings,” and sign in using your account credentials. 2. On your Personal Room page, copy the URL under the Personal Room heading.
How do I invite participants to a WebEx Meeting?
Log in to your organization’s Meeting Center site and click My WebEx on the top navigation bar. A list of meetings appears. Select the meeting from the list and click Start. The Meeting window opens. On your WebEx site, click One-Click Meeting on the left navigation bar. The meeting window opens, and you can then invite participants.
How do I send a link to a WebEx Meeting?
If you need to get the URL to the meeting again, click the “i” icon at the top left of the screen. In the pop-up, copy the meeting link. To invite others to this meeting, just send them the link. You can always find the link to the Webex meeting in the pop-up window on the upper left side of the screen.
