If you want to send a mass mailing to an address list that you maintain in a Microsoft Excel spreadsheet, you can use a Microsoft Word mail merge. The mail merge process creates a sheet of mailing labels that you can print, and each label on the sheet contains an address from the list.
To create and print the mailing labels, you must first prepare the worksheet data in Excel, and then use Word to configure, organize, review, and print the mailing labels.
Note: You can import information from your Excel spreadsheet by importing information from a comma-separated value (.csv) or a text (.txt) file and use the Text Import Wizard to build a new spreadsheet. For more information, see Prepare your Excel data source for a Word mail merge.
When the spreadsheet is ready, store it on your computer. Then open Word, and follow the steps to Print labels for your mailing list
Printing addresses on labels in Excel is a great way to create shipping labels, return address labels, or customize labels for special events. While Excel isn’t designed specifically for label printing, it does provide the tools to make it possible.
In this comprehensive guide we’ll walk through the entire process of creating and printing address labels using Excel. Whether you need to print labels for a few addresses or mass produce labels for a large mailing list these steps will show you how to do it all in Excel.
Why Use Excel to Make Labels?
Excel is not just for crunching numbers and data analysis It also contains powerful features that lend themselves well to label printing and mail merge tasks
-
Organized data – Excel helps you store address lists neatly in rows and columns, ideal for label templates.
-
Mail merge – Merge address data into labels using Excel’s mail merge feature to print directly to labels.
-
Flexible formatting – Format fonts, layouts and more to create customized label designs.
-
Easy editing – Easily update and modify label content and layouts.
-
Compatibility – Seamlessly integrate Excel with Word for advanced label printing capabilities.
For moderate to large mailing lists, Excel combined with Word’s mail merge functionality offers a customizable label printing solution.
Label Printing Considerations
Before we jump into the step-by-step guide, let’s go over a few important points to keep in mind:
-
Page layout – Decide whether portrait or landscape is best for your label sheet.
-
Label dimensions – Measure your labels and adjust margins accordingly in Excel.
-
Label template – Design a label template in Excel matching your labels.
-
Test prints – Print test sheets and adjust the template until labels align properly.
-
Merge fields – Insert merge fields like «Address» and «City» to pull data from Excel.
With these tips in mind, you’ll avoid common issues and have professional looking labels ready to print. Now let’s go through the entire label making process in Excel.
How to Create and Print Address Labels in Excel
Follow these steps to create and print address labels for your mailing list using Excel:
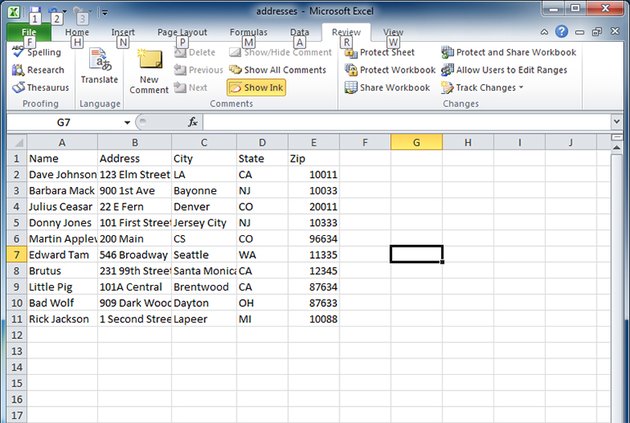
1. Organize Your Address List in Excel
- Create a new worksheet for your list.
- In column A, enter names corresponding to each address.
- In columns B-D, enter the address components (street, city, zip, etc) for each name.
- Be sure to include all elements needed for your labels.
2. Set up the Label Template
- View the page layout to see margins and enable headers/footers.
- Adjust margins to fit your label sheet layout.
- Resize columns and rows to match label dimensions.
- Design labels in each cell with fonts, borders, spacing, etc.
- Add header/footer text like name, date or numbering.
3. Connect the Excel Data to Word
- Open a new blank Word document.
- On the Mailings tab select Start Mail Merge > Step-by-Step Mail Merge Wizard.
- Choose Labels as the document type and select “Change document layout” in the next step.
- Choose details like label vendor, product number and page orientation.
- Select “Use an existing list” and browse to select your Excel worksheet with addresses.
4. Insert Mail Merge Fields into the Label Template
- Return to your Excel worksheet with the label template.
- Click into a label cell and add merge fields like «AddressLine1», «City», «ZipCode».
- Use additional fields like «Name», «Company», etc if needed.
- Format the layout of the merge fields appropriately within the label.
5. Preview and Complete the Merge
- Go back to Word mail merge. Select preview results to validate the merge.
- If everything looks correct, complete the merge, choosing to print the labels.
- Enter page range if needed and select print options.
6. Print Your Address Labels
- Load label sheets into your printer.
- Print a test sheet first to verify alignment.
- Adjust margins or cell sizing in Excel if needed.
- When alignment is correct, print the full batch of labels.
And that’s it! By following these steps you can create customized address labels ready to print directly from Excel.
Advanced Tips for Excel Label Printing
Once you master the basics, there are additional tricks that can streamline your label production:
- Add a button to refreshMergefield data – Links cells to mergefield sources
- Barcode or QR code mergefields – Generate codes to labels
- Auto-fit column widths – Columns adjust to fit address data
- Conditional formatting – Alternate label colors for readability
- Named ranges – Simplify mail merge data selection
- Partial sheet printing – Print only a section of the sheet
- Add graphics and images – Enhance label appearance
The more you work with labels in Excel, the more ways you’ll find to enhance your templates and leverage Excel’s features to save time.
Troubleshooting Common Excel Label Printing Issues
When getting started with label printing in Excel, you may run into common problems like:
- Misaligned labels – Double check margins and cell sizes match label sheet.
- Blank labels – Ensure you inserted merge fields properly without typos.
- Tiny text – Increase font size and row heights for label text.
- Skewed alignments – Verify orientation matches label sheet (portrait vs landscape).
- Error values – Examine data source for invalid merge field references.
- Poor print quality – Try higher DPI setting or lighter background colors.
Adjusting the template formatting and layout is often the fix for many printing issues. Don’t be afraid to test print draft sheets and make tweaks until the results are perfect.
Limitations of Excel for Label Printing
While Excel provides ample tools for basic label printing needs, there are some limitations to be aware of:
- Limited label customization – More design options in dedicated label software.
- No object linking – Images and charts can’t dynamically link to data.
- No mail merge helpers – Word has helpful merge field wizards and validators.
- Difficult duplicate control – Hard to filter out label duplicates.
- Oversized print areas – Large print ranges can cause problems.
For advanced mail merge needs with robust duplicate removal and layouts, dedicated mailing list programs will provide more tailored label printing features. But Excel has the power to handle most basic label requirements if you follow the steps outlined here.
With this comprehensive guide, you should have a firm handle on how to create and print basic address labels in Excel. Follow the steps for organizing your data, setting up a template, performing the mail merge and tweaking the formatting until the labels print just right. The ability to make custom labels exactly when you need them makes Excel an indispensable tool.
Creating Labels from a list in Excel
How do I create address labels in Excel?
The first thing you’ll need to do is create a new Excel workbook and set it up for your address labels. To start, go to the “File” tab and click “New.” Choose “Blank Workbook” and then save your new file with a name that’s easy to remember. In the first row of your new spreadsheet, type the headers for your address labels.
How to create mailing labels in Excel?
The first step in creating mailing labels in Excel is to collect and organize your address data. To do this, you can use a spreadsheet program that has columns for the name, address, city, state, and zip code of each recipient.
Can I use Excel to print address labels?
Excel is a data organization tool, so you cannot use it to design address labels. The best way to print address labels is to use Excel to organize the data and then use Word’s mail merge feature to design the labels. Is there any other way to add contacts to the Word mail merge?
How do I ADD address labels?
To add all address labels on one page, go to “Mailings” and find “Update Labels.” Click “Preview Results” to adjust the spacing and ensure everything is okay. Lastly, click “Finish & Merge” on the right of the “Mailings” options. Select “Edit Individual Documents” and select “All” to get a Word file of your labels.
