If you work with an Excel file that needs to be updated or reviewed by other people, the option to track changes can come in handy.
You can also use it when you’re updating a file and need to keep a track of all the changes you do yourself. This can be helpful when you revisit it sometime later.
Tracking changes in Excel can be a game changer for collaborating and reviewing workbooks. As someone who regularly shares Excel files with colleagues, I’ve found the track changes feature to be invaluable.
In this article, I’ll walk through everything you need to know about tracking changes in Excel, from turning the feature on to accepting/rejecting changes I’ll also cover how to view a list of all changes and the key differences between track changes and comments
Let’s get started!
What is Track Changes in Excel?
The track changes feature in Excel allows you to see exactly what edits were made to a shared workbook, including:
- Who made the changes
- When the changes were made
- Where in the workbook the changes were made
- What the changes were
With track changes turned on, any edits made to cells in the workbook will be highlighted. This provides visibility into changes and helps collaborators review and approve updates.
The track changes history persists for up to 60 days, giving you plenty of time to revisit changes.
How Track Changes Works in Excel
When track changes is enabled in Excel, any manual changes made to cell values will be marked like this:
- The cell will be surrounded by a colored border
- A small colored arrow will appear in the upper left corner
- The column header will change color
An information tip also pops up showing the author, timestamp, old and new values, and cell reference.
The change history will be visually marked on the worksheet so you can see updates at a glance.
Only manual changes will be tracked – formula-driven changes won’t show up. Track changes also only works for shared, multi-user workbooks.
Turning on Track Changes in Excel
The steps to turn on track changes depends a bit on your Excel version. Here’s how to enable it in new and old versions:
Excel Versions After 2016
In newer versions, track changes isn’t directly available so you’ll need to add it to the ribbon:
- Right click the ribbon and customize it
- Add the “Track Changes” command to a new group
- Click the Track Changes button and enable highlighting
Excel 2016 and Earlier
- Go to the Review tab
- Click Track Changes > Highlight Changes
- Check the box to enable tracking
And that’s it! Track changes will now be turned on for the active workbook.
Viewing Tracked Changes in Excel
Once track changes is enabled, you have a few options for viewing edits:
- Changes will be visually marked on the worksheet
- Hover over a changed cell to see the details
- Create a list of all changes on a new sheet
To view the full list on a separate tab:
- Make sure your changes are saved
- Go to Track Changes > Highlight Changes
- Check the “List changes” box and click OK
This list will show all tracked changes in order for easy reviewing. Just note that it won’t update dynamically – you’ll need to regenerate it to see new changes.
Accepting and Rejecting Changes
When reviewing changes, you can accept or reject updates:
- Accept to retain the change
- Reject to revert to the original value
To do this:
- Go to Track Changes > Accept/Reject Changes
- Review each change and choose accept or reject
- Click OK to apply
Accepted changes will remain while rejected changes will go back to the old value.
Turning Off Track Changes
Once you’ve finished reviewing changes, you can turn the tracking off:
- Go to Track Changes > Highlight Changes
- Uncheck “Track changes while editing”
- Click OK
This will remove all the change markings and stop further edits from being tracked.
Key Differences Between Track Changes and Comments
It’s important to understand the key differences between track changes and comments in Excel:
-
Track changes marks edits automatically when a cell value changes.
-
Comments are manually added notes by the user.
-
Track changes show the user, timestamp, old and new values, etc.
-
Comments just show the user and the text they entered.
-
The track changes list is automatically generated.
-
You need a macro to list comments.
-
Track changes doesn’t impact functionality.
-
Adding comments disables certain features.
Troubleshooting Track Changes
Here are some common track changes issues and how to fix them:
-
Changes not showing up? Make sure you’ve saved the workbook after editing. Track changes only logs saved edits.
-
Marks disappearing? Confirm track changes is still enabled and didn’t get turned off accidentally.
-
Prompted to share workbook? Track changes requires a shared, multi-user workbook. Click “ok” to convert to shared.
-
Track changes disabled? It may be turned off if you’re using Excel tables. Try converting the tables to ranges.
-
Changes not listed properly? Be sure to regenerate the list if new edits aren’t showing up. The list isn’t dynamic.
Best Practices for Track Changes
To get the most out of track changes, here are a few top tips:
-
Enable it at the start of collaboration before editing begins.
-
Review changes frequently instead of letting them pile up.
-
Consider protecting sheets after enabling track changes to limit editing access.
-
Accept/reject changes in a timely manner so collaborators can see updates.
-
Turn it off when finished reviewing to remove markings.
-
Don’t forget to regenerate the change list to view recent edits.
Next Steps to Master Track Changes
With this foundation, you’re well on your way to mastering track changes in Excel!
Next, spend some time enabling it for your workbooks and get familiar with how edits appear.
Try having a colleague make sample changes so you can practice reviewing them. The more you use it, the easier it’ll become.
You’ll be leveraging the power of track changes for your collabs in no time. Thanks for reading and be sure to check back for more Excel tips!
Enabling the Track Changes in Excel Feature
By default, this feature is disabled in Excel.
Here are the steps to enable track changes in Excel:
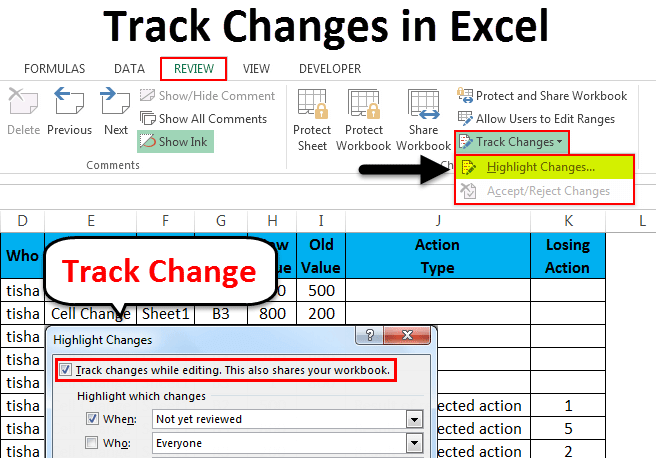
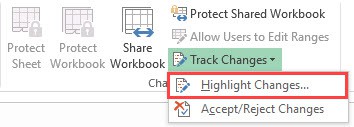
- Go to the Review tab.
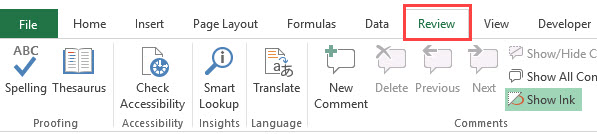
- In the Changes group, click on the Track Changes option and select Highlight Changes.
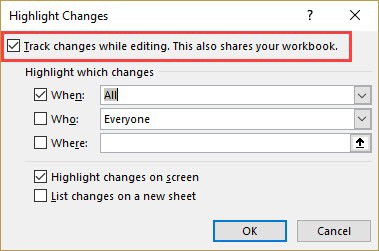
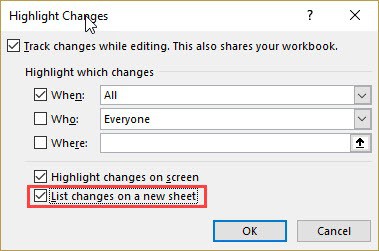
- In the Highlight Changes dialog box, check the option – ‘Track changes while editing. This also shares your workbook’. You can also specify the ‘When’, ‘Who’, and ‘Where’ options. For this tutorial, I will go with the default settings.
- Click OK.
The above steps would enable ‘Track Changes’ in Excel and now it will highlight any change done to the workbook.
Note: For this option to work, you need to have the workbook saved on your system or a network drive. If the file has not been saved, it will first ask you to save it before enabling the ‘Track Changes’ option. If the file is already saved, it will still save it before enabling the tracking.
Getting a List of All the Changes
If you have a workbook that has a lot of changes made to it, you may want to get a list of all the changes separately as a list.
Here are the steps to get a list of all the changes in a new worksheet:
- Save the workbook so that the changes that are made are saved as well.
- Go to the Review tab.
- In the Changes group, click on Track Changes and select Highlight Changes.
- In the ‘Highlight Changes’ dialog box, check the option – ‘List changes on a new sheet’. In the ‘When’ option, you can specify if you want all changes or changes that are not reviewed or ‘changes since last saved’.
- Click Ok.

This will instantly create a new worksheet that will list all the changes that you have made.
When the changes are made, these are not final until you review these changes. This can be useful when you have the reviewed file from your colleague/boss/client, and you have to decide on what changes are to be kept and which ones are to be rejected.
Here are the steps to accept/reject changes in Excel:
- Go to the Review tab.
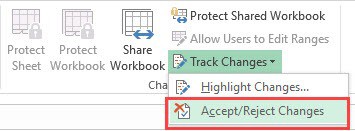
- In the Changes group, click on the ‘Track Changes’ and select ‘Accept/Reject Changes’.
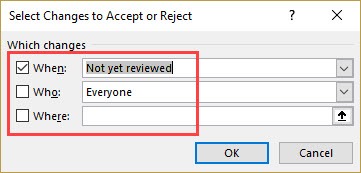
- In the ‘Select Changes to be Accepted or Rejected’ dialog box, specify the When, Who, and, Where options.
- In ‘When’ you can select all changes that have not been reviewed or specify a date.
- In ‘Who’ you can select whose changes you want to review.
- In ‘Where’, you can select a range of cells in which you want to review the changes.
- Click Ok. This will open the ‘Accept or Reject Changes’ dialog box.
- In the ‘Accept or Reject Changes’ dialog box, you can accept changes one by one, or accept/reject all changes at once.
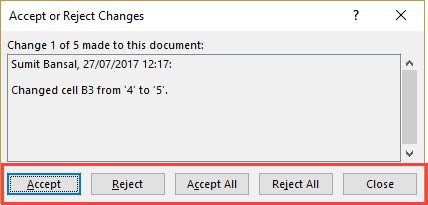
If you reject a change, it will revert back to the original value.
Note that when you accept a change, you can not undo it.
How to Use Track Changes in Excel
How do I track changes in Excel?
Excel offers three different modes of track changes: Highlight changes, List changes on a new sheet, and Track changes while editing. The Highlight Changes mode highlights any changes in the document in real-time, while List changes on a new sheet creates a new sheet listing all changes made in a document.
How do I track changes in a shared workbook?
If you share the workbook there’s an option to track changes in a change history (xl help: change history: In a shared workbook, information that is maintained about changes made in past editing sessions. The information includes the name of the person who made each change, when the change was made, and what data was changed.).
How do I view changes in Excel?
In both the desktop and web versions of Excel the Show Changes feature can be found on the ribbon, under the Review tab. Clicking this will bring up a task pane on the right-hand side. Here the most recent edits to the file are shown at the top and you can scroll down to view earlier changes.
