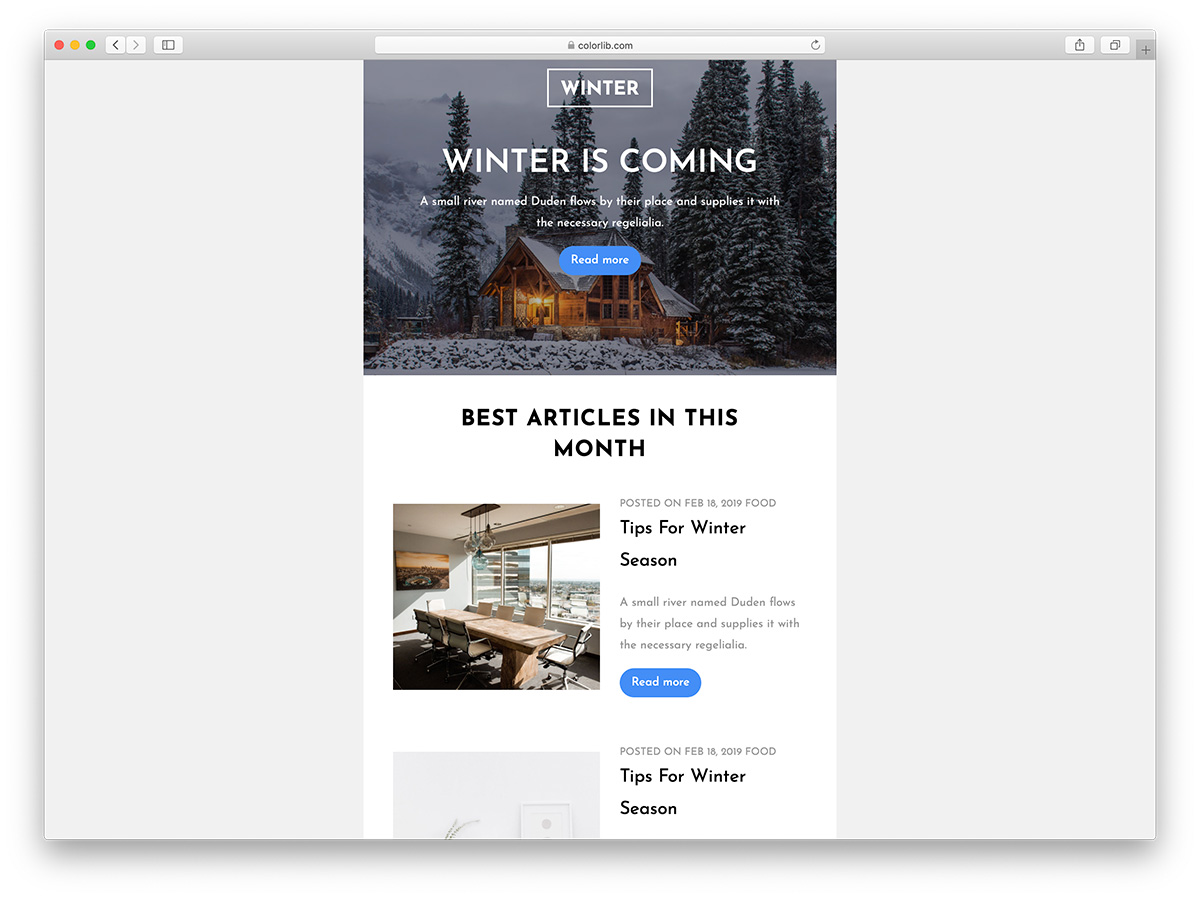
Quick pop quiz: What’s the name of the language that web developers use to create the structures of the sites you visit every day? Smart and over-clever answers aside, Hypertext Markup Language (HTML) is an evergreen standard, present at the birth of the web. However, this doesn’t only apply to web pages. Your inbox is fertile ground for HTML email design.
This makes sense if you consider how many s, GIFs, videos, and branded content you see almost every hour in your emails. While you could offer a plain text email, an HTML version will offer more benefits and give you more opportunities to brand and market yourself and your business.
For this post, we’re going to discuss how to create and send HTML emails, and why you should do so. At some points, we’ll get deep into how you’d code up an email, but you won’t need this knowledge to create your own.
Email marketing can be an extremely powerful way to engage with your audience But creating an effective HTML email that renders properly across different email clients can be tricky In this comprehensive guide, I’ll walk you through the entire process of coding a responsive HTML email template from start to finish using basic HTML and CSS.
Whether you’re new to HTML email development or looking to improve your skills, you’ll learn the key steps needed to build, style, and test a polished and professional HTML email. Let’s dive in!
Why Create HTML Emails?
Before we start writing code, let’s first discuss why you should take the time to create HTML emails instead of using a drag-and-drop email builder:
-
Full design control – With HTML, you can craft emails exactly how you like with customized code. No constraints from premade templates.
-
Responsive structure – Properly coded HTML emails adapt across mobile and desktop screens This improves engagement
-
Cross-client compatibility – HTML gives you direct control over elements to ensure your email displays consistently across email clients
-
Enhanced analytics – HTML allows you to add trackable links for gauging engagement. Drag-and-drop builders often lack this.
-
Improved deliverability – HTML emails following best practices are more likely to reach inboxes and avoid spam folders.
-
Cost savings – HTML skills allow you to create quality emails without relying on expensive designers.
Let’s now get started with coding our responsive HTML email!
Step 1: Open an HTML Editor
You’ll first want to open up an application to write and edit your HTML and CSS code. Some top options:
- Code editors like Visual Studio Code, Atom, Sublime
- Web development programs like Adobe Dreamweaver
- Simple text editors like Notepad or TextEdit
I’ll be using Visual Studio Code today.
Step 2: Set Up the Initial HTML Document
Next, we need to set up the basic HTML document structure:
<!DOCTYPE html><html lang="en"><head> <meta charset="UTF-8"> <title>HTML Email</title></head><body></body></html>This standard HTML starting point gives us a foundation to build on.
Step 3: Add the Main Email Table
Now we can add a <table> element inside the <body> that will hold our entire email structure:
<body> <table width="100%" border="0" cellpadding="0" cellspacing="0"> </table></body>Defining width="100%" makes the table extend full width. border="0" removes borders. cellpadding and cellspacing remove unwanted space.
Step 4: Build the Email Header
Inside our main table, let’s use nested tables to create the email header:
<table width="100%" border="0" cellpadding="0" cellspacing="0"> <tr> <td> <!-- Header --> <table width="100%" border="0" cellpadding="0" cellspacing="0"> <tr> <td> <!-- Logo --> </td> </tr> </table> </td> </tr></table>This includes a logo placeholder inside a row. We’ll add the actual logo image later.
Step 5: Add the Email Body Content
Now let’s build out the main content area beneath the header using another <table>:
<!-- Body --> <table width="100%" border="0" cellpadding="0" cellspacing="0"> <tr> <td> <!-- Content --> </td> </tr> </table>This is where we’ll insert the actual text, images, buttons, and other elements that make up the email content.
Step 6: Create the Email Footer
Finally, we’ll add one last <table> for the footer:
<!-- Footer --> <table width="100%" border="0" cellpadding="0" cellspacing="0"> <tr> <td> <!-- Footer links --> </td> </tr> </table>Common footer content includes contact details, address, links, and unsubscribe option.
Step 7: Add Styles Using CSS
Our HTML structure is complete! Now we can move on to styling things like color, font, spacing, and images.
To add CSS, include a <style> tag in the <head>:
<head> <style> /* CSS rules go here */ </style></head>Here are some common CSS properties to style an HTML email:
/* Set font family and size */body { font-family: Arial, Helvetica, sans-serif; font-size: 15px; }/* Set link colors */a { color: #346DB7;}/* Image styles */ img { border: 0; width: 100%; max-width: 600px; height: auto;}Step 8: Add Content and Images
Now we can insert actual text paragraphs, images, links, and buttons into our email structure:
<!-- Email content --><p>Hi John,</p><p>Check out our summer sale below! Use code <b>SUMMER21</b> to save 25%...</p><!-- Call-to-action button --><a href="#" target="_blank"> <img src="button.jpg" alt="Shop Summer Sale" title="Shop Summer Sale"></a> <!-- Sale image --><img src="summer-sale.jpg" alt="Summer Sale" width="600" height="300"><!-- Footer --><p>Jane Smith, ABC Company</p>This adds content while maintaining our template structure.
Step 9: Preview and Test Your Email
The final step is to preview your email in different email clients and mobile devices. Some options:
- Browser Inspector on Chrome, Firefox for mobile views
- Email on Acid for cross-client tests
- Send test emails to yourself
Fix any issues with styling, layout, spacing, etc. Then confirm everything renders well.
And that’s it! From start to finish, you now have a custom-coded HTML email template. With these key steps, you can build HTML emails that engage audiences across all major email platforms.
Create the Foundation For Your HTML Email
It’s a good idea to start with the skeleton of your email template. This will follow some typical practices for HTML in general:
There are a few things going on here that we should mention. First, we specify a “doctype” for Transitional XHTML 1.0, which is a common practice among email developers. From there, we specify an XML namespace, which will be important later.
You’ll also notice some meta tags, and these define the character set and how the browser should render the HTML that follows in its viewport.
The rest of the skeleton is straightforward – there’s the title and body tags that we’ll use next.
The Technical Approach You’ll Need to Take to Create an HTML Email
If you have some web development experience, you’ll no doubt use HTML5 as your markup language. This is a world apart from previous instances of HTML and XHTML and includes more of a division between styling (of which there are practically zero elements that are valid) and structure.
For an example of the latter, HTML5 offers a number of different tags to define content areas of your site.

However, email HTML is a different beast, in as much as it’s behind the times somewhat. As such, you’ll want to use all of those old HTML4 tables and inline styling to create your layout. For why this is, you’d need to speak to the developers of email clients, as they will often alter the HTML email as it comes into your inbox. One of the most common acts is to strip CSS and JavaScript out of emails for security reasons (among others).
This means you’ll need to provide another way to add styling to your HTML emails – inline is the only option for compatibility. Speaking of compatibility, this is an important consideration. You have to balance a unique styling with the capabilities of the end user’s email client. As such, there are a few other technical considerations you’ll want to note:
- Using system fonts rather than a third-party one will save you an HTTP request, load the email fast for the user, and deliver a consistent-looking email to boot.
- You could go even further and provide a plain text version of your email for those who can’t view HTML email in their client. Lots of sites will offer an HTML version you can access online, for both this reason and as a backup.
- Alt-text is just as important for HTML emails as it is for the web. As such, use alt text everywhere you add an to your content for accessibility.
There’s one technical aspect of an HTML email that you should think about more, as it can straddle the line between inline styling, CSS, and other factors. Let’s discuss “conditionals” in brief.
One holdover of HTML emails that used to be in an older HTML web developer’s toolkit is that of conditionals. This is where you specify which browser will use a particular code snippet.
In honesty, this is almost always a Microsoft-based issue. For web developers, Internet Explorer (IE) was the demon browser spawn. However, for HTML emails, it’s Outlook. Between the different versions, you may see that your styling renders in a way you didn’t expect.
Because of this, you can add condition blocks to your code, and define those elements. For example, you can target both Word-based and IE-based versions of Outlook.
First, Word:
This is for Word-based versions of Outlook:
For Internet Explorer, you use a different tag:
This is for IE-based versions of Outlook:
If the browser you target is WebKit-based (such as Apple Safari, the PlayStation browser, Amazon’s Kindle, and more), you can use a media query to provide specific styling:
This gives you a slightly better way to adapt your HTML email to the end user’s display. On the whole, HTML styling for emails isn’t perfect, but there is enough grunt under the hood of each email client to help you create some stunning layouts.
The RIGHT WAY to Build HTML Email Templates 2024
Can you create your own HTML emails?
While you could buy a dedicated HTML template, creating your own HTML emails is not that difficult. It could be the way you succeed if you have a specific vision in mind. However, you’ll need to pull out your old HTML tricks, such as conditionals and nested tables.
How do I use a free HTML email template?
To use this free HTML email template, you’ll need to sign up for an ActiveCampaign free trial. Its email tool starts at $49 per month and includes three seats, making this template a great fit if your email marketing team includes several people. Pro tip: Want your clients to view real-time content that is updated every few minutes?
How do I make an HTML email work across email clients?
Making an HTML email work across email clients ain’t an easy task. Fortunately, there are plenty of reliable tools, templates and frameworks to make it easier to get your work done. For example, Maizzle is a framework that helps you quickly build HTML emails with Tailwind CSS and advanced, email-specific post-processing.
How do I create an HTML email from scratch?
To create an HTML email completely from scratch, you’ll need to have an advanced knowledge of HTML (or work with a developer who does). This guide offers a solid overview of coding a basic HTML email.
