Dashboards are an incredibly useful tool for visualizing and analyzing data in Excel. With the right setup, an Excel dashboard can provide a single place to monitor and understand key metrics and data points for your business, project, or personal finances.
In this step-by-step guide, you’ll learn how to create a functional, aesthetically pleasing dashboard in Excel
Step 1: Import and Organize Your Data
The first step in building your dashboard is to import the data you want to track and organize it into a table.
Here are some tips for importing and formatting your data:
-
Keep your raw data on a separate worksheet tab. This preserves the integrity of the original data and allows you to easily refresh the dashboard if the source data changes.
-
Format the raw data as an Excel table (Home tab > Format as Table). This will allow you to reference the table columns in dashboard formulas.
-
Be consistent with column headers, data types, and formatting in the raw data. This will make the data easier to work with when building dashboard visualizations.
-
Only include the minimum columns and rows of raw data needed for your dashboard. Too much extraneous data will overcomplicate the dashboard build.
-
Make sure data is formatted consistently (dates, currencies, percentages, etc.) to avoid errors in dashboard formulas.
Following these best practices will set you up for success when it’s time to start building your dashboard visualizations
Step 2: Plan Your Dashboard Layout
Now that your raw data is imported and organized, the next step is to plan the layout and design of your dashboard.
Here are some key layout considerations:
-
Who is the audience? Keep the dashboard user and their needs top of mind. Use large, easy-to-read fonts and visuals.
-
What is the goal? Determine the key data points and metrics to showcase. Remove any unnecessary clutter.
-
Use themes and color schemes intentionally. Colors should communicate (red for negative, green for positive) but not distract.
-
White space is your friend. Don’t overcrowd the dashboard. Leave ample space between visuals and text.
-
Multiple tabs welcome. Use separate tabs to organize related data into logical groups.
Sketching some quick wireframe layouts on paper can help optimize the dashboard design before building in Excel. Pay attention to arrangement of visuals, optimal chart types for data display, and overall flow of information.
Step 3: Connect Your Data to Excel Charts
With a solid layout planned, it’s time to start building your Excel dashboard by creating charts and tables linked to your imported data.
Here’s a process that works well:
-
Build charts on their own worksheets. Keeping charts and data separate makes your dashboard tabs less cluttered.
-
Use Excel table references for chart data sources. Formulas like =SalesTable will dynamically pull from your imported data tables.
-
Make charts easy to understand. Include clear labels, avoid overloaded complex charts.
-
Use recommended chart types. Choose chart types suited for your data types (column for time series, pie for % breakouts).
-
Filter down to key data. Only include the minimum rows/columns needed for a clear snapshot. Remove clutter.
-
Use data validation for dynamic filtering. Allow dashboard users to filter data based on cell dropdown lists.
Follow these tips as you add new data visualizations to your dashboard. Remember: the charts should provide an easy-to-digest snapshot of data insights.
Step 4: Build Core Calculations and Metrics
Raw data visualizations only provide part of the story. To turn your Excel dashboard into an insightful strategic tool, you’ll need to build in core calculations and metrics.
Some examples include:
-
Time intelligence metrics – m/m growth, y/y growth, 4 week rolling average etc.
-
KPI status indicators – Actual vs. Target variance, Previous Period vs. Current comparison.
-
Rankings or top/bottom performers – Top 10 customers by sales, bottom 5 products by profit.
-
Conditional formatting for outliers or anomalies – Format cells red if > 1 standard deviation from mean.
-
Charts focused on metrics vs. raw data – Column chart showing m/m growth for each product.
Think through the critical numbers, ratios, and trends you want your dashboard audience to monitor. Then build those calculations into the dashboard using straightforward formulas that link to your raw data tables.
Step 5: Develop a User-Friendly Interface
At this point, you’ve built charts, tables, calculations and other core components of your Excel dashboard. The next step is to refine the user interface for a seamless experience accessing each view.
Some tips for a polished interface:
-
Organize workbook tabs – Group related tabs, hide unnecessary sheets. Name tabs clearly.
-
Add navigation buttons – Insert Form Control buttons to jump between tabs.
-
Guide user flow with text – Use text boxes to explain dashboard sections, provide insights.
-
Limit scrollbars – Keep ample white space, size visuals to avoid excessive vertical/horizontal scrolls.
-
Enable user interactivity via filters, slicers – Allow users to filter and splice data on the fly.
-
Make key numbers stand out – Use large fonts, bolding, colors to draw user attention to KPIs.
-
Check all cell references – Ensure references point to intended cells after adding/moving visuals.
By improving the user interface, you can transform a static dashboard into an interactive experience where users can dive into the data.
Step 6: Add Advanced Features (Optional)
For power users, Excel provides a few advanced features to take your dashboard to the next level:
-
Sparklines – Display trends beside cells/metrics for quick historical context.
-
Conditional formatting – Colors cells based on value thresholds for quick visual insights.
-
Linked visualizations – Link charts so filtering one impacts others on the dashboard.
-
Named ranges – Define named ranges to simplify referencing cells in multiple formulas.
-
Macros to automate – Record macros for repeated analyses and formatting tasks.
-
Pivot tables to supplement – Add pivots for ad hoc analyses that complement dashboard views.
Don’t go overboard with advanced functionality. Keep the end user experience and workflow in mind. Use these features strategically to fill gaps in analysis.
Step 7: Implement Dashboard Security (as needed)
If sensitive data will be displayed in the Excel dashboard, it’s a best practice to implement security measures such as:
-
Password protecting sheets – Prevent unauthorized access to underlying data tables.
-
Limiting user interaction – Lock down specific cells or ranges to avoid accidental changes.
-
Data obfuscation – Mask confidential info (e.g. only show last 4 digits of credit cards).
-
Cell data validation – Control permissible types of data entered into cells.
-
Workbook protection – Password protect or seal workbooks to avoid tampering.
Balance dashboard access and security based on your specific use case. The goal is to provide visibility into key data while preventing confidential information from getting into the wrong hands.
Let Your Excel Dashboard Evolve Iteratively
Don’t aim for perfection on the first dashboard draft. Building an effective Excel dashboard takes an iterative approach.
Start with MVP (minimum viable product) and gather user feedback. Work through multiple versions to refine the layout, visuals, data and calculations. Treat it as a living, breathing tool that evolves over time.
The more you use your dashboard, the better you’ll understand what works, what doesn’t, and what enhancements are needed. Enjoy the journey!
Key Takeaways
Here are the major steps to keep top of mind when building dashboards in Excel:
-
Import and prepare your raw data source properly for easy analysis.
-
Plan an effective dashboard layout based on audience, goals, and workflow.
-
Build charts and tables linked to your data source. Focus on key insights.
-
Include core calculations and KPIs tuned to your analysis needs.
-
Design an intuitive, user-friendly interface. Make data easy to access and interpret.
-
Add advanced features strategically to fill analytical gaps as needed.
-
Implement security to safeguard sensitive information.
-
Take an iterative approach. Refine and improve the dashboard over time.
By following this dashboard development process, you can create an informative, visually appealing tool for better business intelligence and decision making. The end result will be worth the effort invested!
How to create an Excel Dashboard
You know how we just said you’ll be faced with tons of options to represent your data? We weren’t kidding—there are bar charts, column charts, pie charts, line charts, scatter plots, waterfall charts, and so many more.
However, not all of them will be the best fit for the data that you want to represent. For example, a line chart is excellent for analyzing trends while a pie chart is effective for looking at a snapshot in time.
Not sure which chart is the best choice for you? Your best bet is to play around. Create a few different charts, look at the results, and see which ones make the most sense for displaying your data in an easily digestible manner.
With so many options, we couldn’t possibly dive into every chart type in detail here. So, instead, we’re going to dip our toes into the dashboard waters by focusing on the step-by-step process for creating one specific type of chart: a column chart.
We’ll stick with the same budget data set that we used above. Our goal is to create column charts that will display how much we spend on each individual budget line item per month in the first quarter. This means that we’ll end up with separate charts for electricity, gas, phone, etc.
Ready? Let’s get started.
Set up your workbook
To create a dashboard, you’re going to need three separate sheets (or tabs) within your Excel workbook.
Name your first tab (the one that has all of your raw data on it) with something you’ll readily recognize—such as “Data” or “Raw Data.”
Then, create a second tab labeled “Chart Data.” That tab is where you’ll store only the data that needs to be fed into different charts for the dashboard. Finally, create a tab labeled “Dashboard” where your various charts will appear.
You can leave those last two tabs totally blank for now! The important part is just to get your workbook set up and ready to work with.
How to Build Excel Interactive Dashboards
How to create a ‘data’ & ‘dashboard’ in Excel?
Go ahead and open a blank Excel workbook and start by creating two sheets named ‘Data’ and ‘Dashboard’. 1. Import Since the marketing team sent us a static CSV file, we will import it into our Excel workbook by copying and pasting it into the ‘Data’ sheet. I have also selected “Format as Table” so that Excel regards this data set as a table.
How do I create a dashboard?
Data is the foundation of any dashboard. Ensure all the information you want to display is accurate and organized. This could be sales figures, customer data, or any other metrics relevant to your needs. Open Excel and start a new workbook for your dashboard. A clean slate is essential for creating an organized dashboard.
What is a dashboard in Excel?
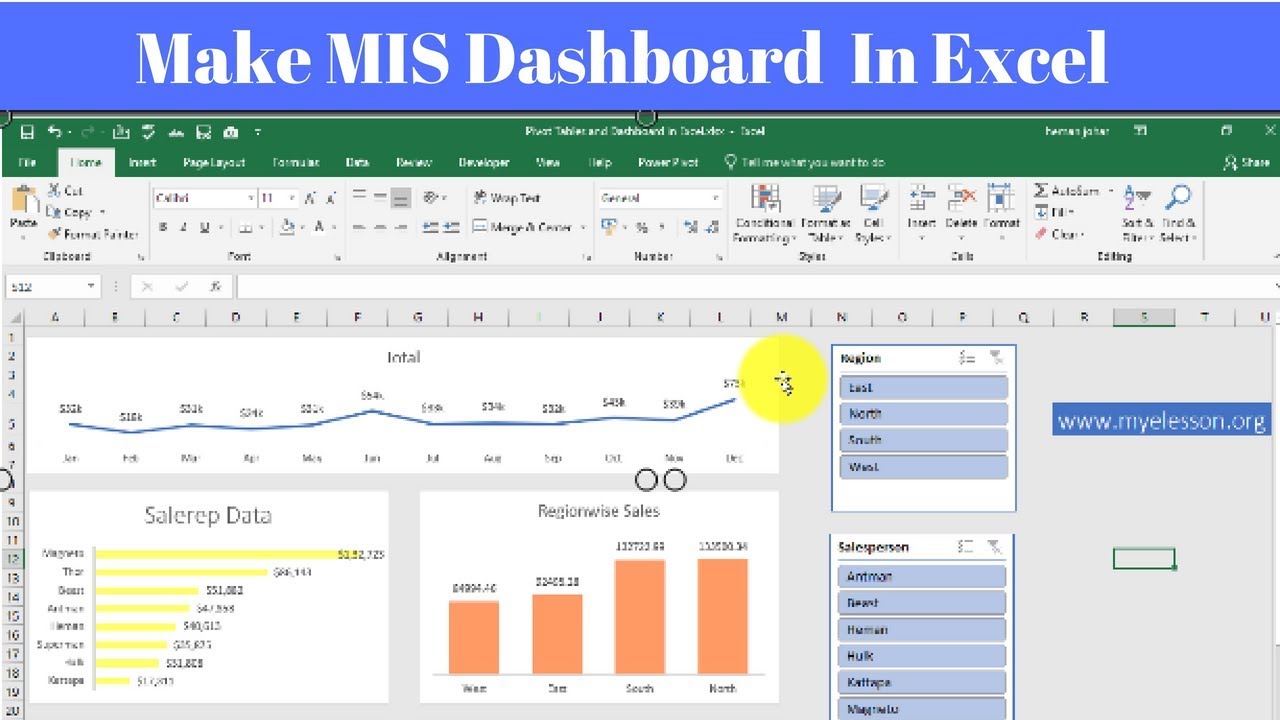
Before we move on to the actual creation process, it’s important that you understand exactly what is a dashboard in Excel. Excel dashboards are visual portrayals of data. They provide a complete overview of large amounts of data, which means you can use them to quickly pull out and check a specific metric or KPI.
How do I organize my Excel data dashboard?
Add different tabs – To organize your dashboard, we recommend using different tabs for showcasing different things. Freeze panes are useful – For larger excel data dashboards, you can use freeze panes to make navigation easier.
