Its ability to support documents on the internet, not through downloaded software, makes it ideal to share documents between companies.
The suite eliminates compatibility issues between software programs. Its shared editing features which update in real-time make it unmatched by its competitors, and its usage is growing by the day. It’s a ubiquitous way to create a document or presentation and easily share it or convert it to a PDF.
However, some of its functionalities – especially in Google Docs – aren’t always obvious to the user. It’s worth explaining some details of how to use basic editing tools and highlight the keyboard shortcuts users should know.
Adding a picture to a Google Doc is simple, but do you know how to rotate the from landscape orientation to portrait orientation?
As a frequent Google Docs user, I often need to insert images into my documents. However, sometimes these images are oriented incorrectly or I want to rotate them to fit my document’s layout better. Fortunately, Google Docs makes it easy to rotate images right within the document editor.
In this comprehensive guide, I’ll walk through the various methods you can use to rotate an image in Google Docs, using simple step-by-step instructions Whether you need to flip an image upside down, spin it on an angle, or make precise 90 degree turns, there are several rotation options at your disposal
Why Rotate Images in Google Docs?
Before diving into the how-to steps, let’s briefly go over some reasons you may want to rotate an image in a Google Doc:
-
The original image was captured sideways, upside down, or on an angle Rotating it makes the image upright
-
You want to fit an image into a tight space so rotating it helps optimize the fit.
-
Flipping an image upside down or sideways can make it stand out on the page.
-
Rotating an image breaks up long sections of text and makes your document visually interesting
-
You’re creating a document in multiple languages and need to rotate text boxes to fit different language orientations.
-
Precision angles or repeated 90 degree turns are required to get the image perfectly aligned.
The ability to quickly rotate an image unlocks better document design. Now let’s look at how to do it in Google Docs.
Method 1: Rotate Image Using Blue Dot Icon
The quickest and easiest way to rotate an image in Google Docs is using the blue dot rotation icon. Here are the simple steps:
-
Click on the image you want to rotate to select it.
-
Locate the small blue dot at the top center of the image.
-
Click and drag the blue dot left or right to rotate the image.
-
Once the image reaches your desired angle, release the mouse button.
The blue dot allows you to freely rotate the image to any angle you want. As you rotate, a guide displays the number of degrees the image has turned. This offers precise control over the rotation angle.
If your image shifts off the page when rotating, you may need to resize it smaller first before rotating to ensure it fits within the document margins.
The benefit of the blue dot method is that you can quickly eyeball the rotation amount instead of having to calculate a specific angle. For most basic image rotation needs in Docs, this is the easiest way.
Method 2: Use the Image Options to Rotate Precisely
For more precision, access the Image options sidebar. Here are the steps:
-
Click the image to select it, then click the “Image options” icon in the toolbar.
-
In the sidebar, expand the “Size & Rotation” section.
-
Enter an exact rotation angle in degrees in the “Angle” text box. For example, enter 90 to rotate it precisely 90 degrees.
-
You can also rotate the image in precise increments by clicking the up/down angle arrows next to the Angle text box.
-
To rotate the image 90 degrees counterclockwise, click the “Rotate counterclockwise” icon. Click it again to keep rotating in 90 degree turns.
-
When finished, click outside the image to close the sidebar.
The Image options sidebar also lets you flip or mirror the image horizontally or vertically. This quickly rotates the image 180 degrees up/down or left/right.
I recommend this method when you need to rotate an image to an exact angle. The rotation controls allow accurate modifications down to the degree.
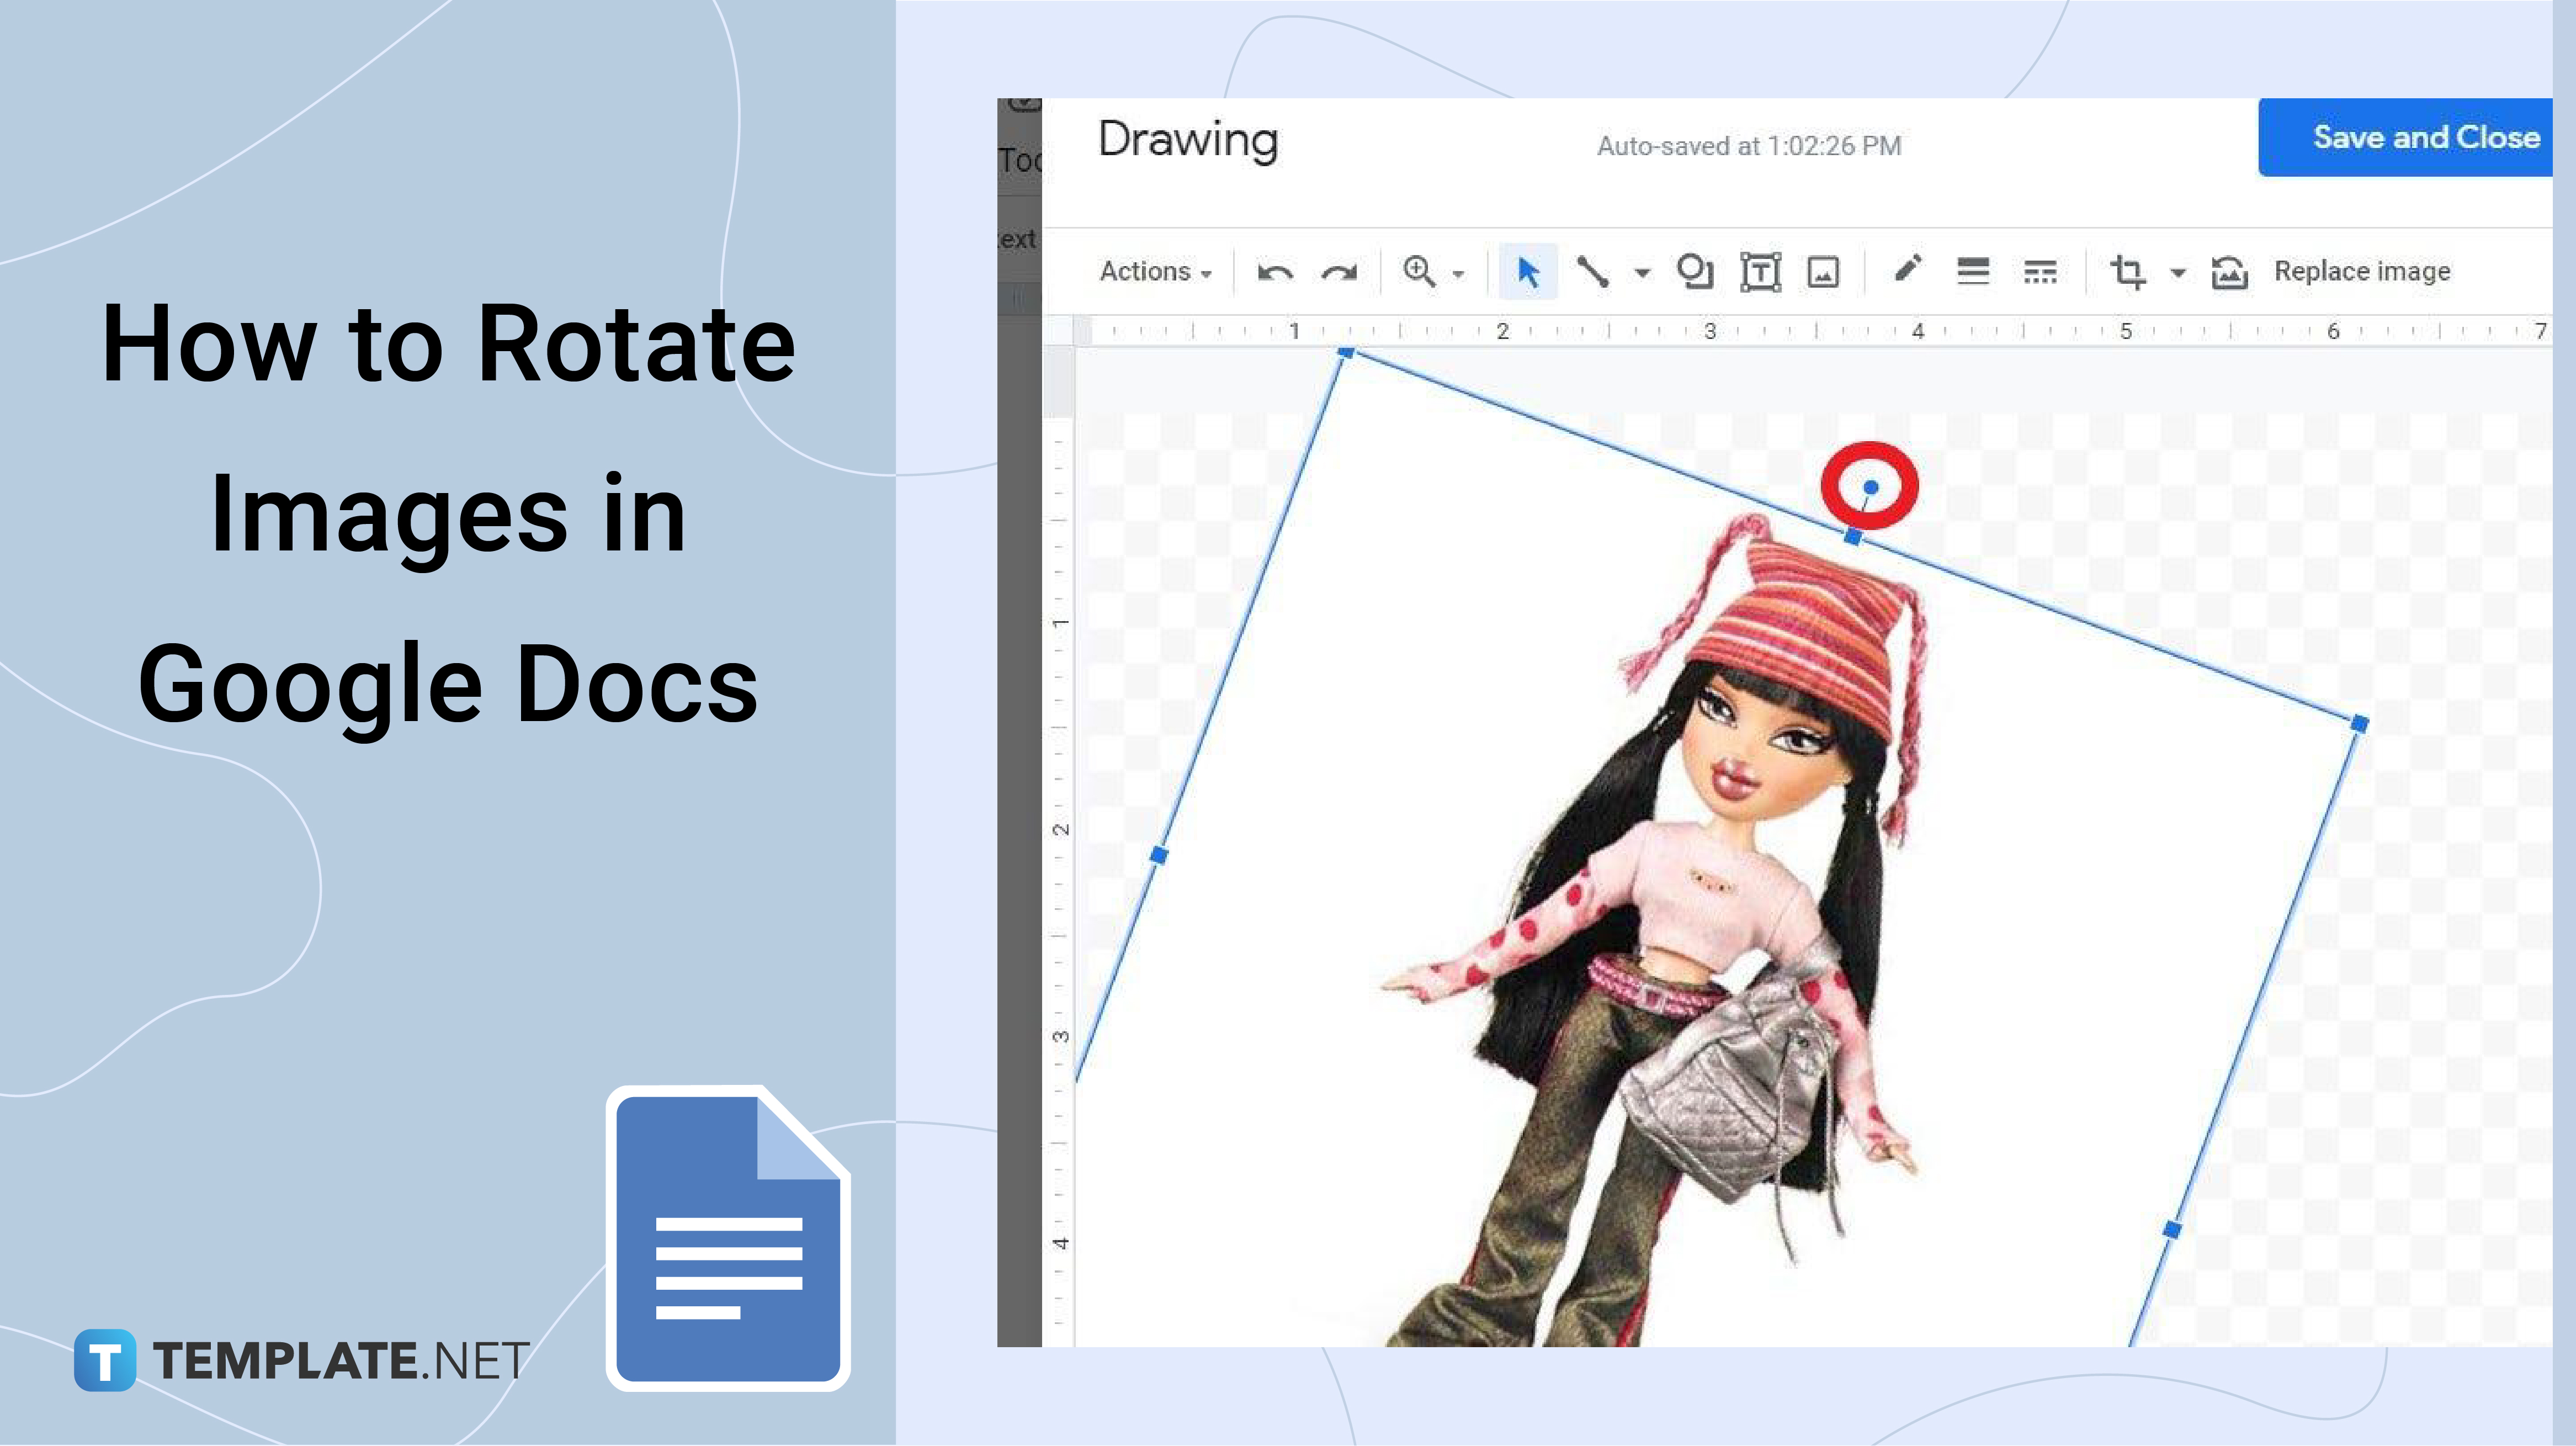
Method 3: Rotate Inside the Drawing Editor
Google Docs has a built-in drawing editor you may not know about. You can actually add images into the drawing editor, rotate them there, and insert the rotated image into your doc. Here’s how:
-
On the Docs toolbar, select Insert > Drawing > New. The drawing editor opens.
-
Click the Image icon in the drawing editor toolbar. Choose your image.
-
With the image selected, use the Rotate options in the toolbar to turn the image as needed.
-
Click “Save and close” when done. The rotated image appears in your document.
The drawing editor provides additional image rotation options like flipping vertically or horizontally. You can also freely rotate images with the rotation handle in the editor.
Use this method when you need robust image rotation capabilities. The dedicated drawing editor provides more control than the standard image options in Docs.
Rotating Text Boxes in Google Docs
In addition to images, you may occasionally need to rotate a text box or shape in Google Docs. The drawing editor method works great for this. The steps are:
-
Select Insert > Drawing > New from the Docs toolbar.
-
In the drawing editor, insert a text box using the “Text box” option.
-
Enter your text in the text box. Then use the rotate options to angle it as needed.
-
Click “Save and close” to insert the rotated text box into your document.
This is an easy way to add angled or sideways text to your document when needed for visual interest or layout purposes.
Handy Tips for Rotating Images in Google Docs
Now that you’re a pro at rotating images in Google Docs, here are some helpful tips to make it even easier:
-
To reset an image back to its original orientation, click the “Reset image” icon in the toolbar.
-
You can crop the image after rotating to remove any unwanted edges or white space.
-
Adjust the transparency on a rotated image to create a watermark effect.
-
Stack and rotate multiple images to create cool collage designs.
-
Rotate an image onto its side or corner to add visual flair to headers, titles, or dividers.
-
Flip images upside down if they ever display inverted unexpectedly to quickly reverse them.
-
For large rotations, you may need to resize the image smaller so it fits within the document margins.
With this comprehensive guide, you have all the techniques you need to effortlessly rotate images in Google Docs. Keep these tips handy so you can add visual interest and improved layouts to your Docs projects. Confidently rotate images like a pro!
Method 1 for Rotating an Image in Google Docs:
This is the simplest way to rotate an in Google Docs:
1. From the top toolbar, select “Insert.” 2. Select “” from the dropdown menu. 3. Choose where you want to pull the from. Options include uploading from your computer, Google Drive, or Google Photos. You can also insert an from a URL. It will take you to a dialog box where you can choose.

4. Once the is inserted in the document, make sure it’s selected and surrounded by a blue border with square handles on the corners. If not, click on the . When the is selected, the blue border will appear and a small blue circle will appear at the top.

The small blue circle will appear as an extension of the border at the top. See the video below for a live-action example.

5. Rotate the by clicking and dragging in whichever direction you want. Let go of the mouse. If you only want it to move small amounts at a time, hold down the “Shift” button.
Double check your has rotated successfully. And you’re all set!
It’s simple, and once you get the hang of it, you’ll be able to edit and rotate s within the document with ease.
Now, let’s examine a slightly more complicated way to perform a basic editing process like an rotation in a Google Doc.
How to Rotate an Image in Google Docs
There are two ways to rotate an in Google Docs. Let’s review both of them, so you have a solid understanding of how to complete the task efficiently.
How To Rotate An Image On Google Docs
How do I flip a photo in Google Docs?
To get started, open your favorite web browser on your computer and launch the Google Docs site. On the site, select the document in which you want to flip a photo. In the document, find the image you want to flip. Then right-click this image and choose “Cut.” Open the Docs’ Drawing tool by clicking Insert > Drawing > New in the menu bar.
Why do I rotate images in Google Docs?
While it often depends on the type of document you’re working on, a common reason to rotate an image in Google Docs is to address a formatting error. For example, if the image you added to your document is upside down, you might rotate it until it’s oriented in the way you want.
How do I crop an image in Google Docs?
But in Google Docs, you can do all of these without leaving the app. Once you insert an image (from the menu, or just drag and drop it) and select it, you’ll see an editing toolbox becoming available on the menu. To crop an image, select it in your document and click the crop icon in the toolbar.
