As an avid Excel user, you likely have sensitive data like financial records, customer info, project details and more in your workbooks. The last thing you want is prying eyes accessing your private Excel files.
That’s why learning how to password protect on Excel is a crucial skill.
In this hands-on guide, I’ll walk you through everything you need to know to lock down your Excel files and give you peace of mind. You’ll learn
- Why password protection is critical for your Excel workbooks
- The step-by-step process to password protect your files
- How to lock specific worksheets while leaving others editable
- Advanced tactics like digital signatures to complement password protection
- Tips to remove or change passwords with ease
- How to troubleshoot any issues with password protecting Excel files
Follow along and I’ll turn you into an Excel file security pro in no time! Let’s do this.
Why Bother Password Protecting Excel Files?
I know creating and remembering passwords can feel like a chore. But trust me, taking a few minutes to add password protection is time well spent.
Here are some key reasons you should secure your Excel files:
-
Stop unauthorized access – A password prevents people from opening and viewing your workbook without your permission. This keeps your proprietary company data or personal info private.
-
Prevent accidental changes – Locking cells, worksheets or entire workbooks will block people from editing your Excel files by accident. No more formula mishaps!
-
Meet compliance regulations – In regulated industries like healthcare and finance, you may be legally required to control access to sensitive data stored in Excel.
-
Protect intellectual property – Your Excel workbooks probably contain business logic, financial models and other IP worth protecting behind a password.
-
Safeguard client data – If your Excel files contain any client or customer data, you have an ethical obligation to keep it secure.
The risks of leaving your Excel files unprotected are just too great. A weak password is better than no password at all.
So let’s get your files locked down properly!
Step 1: Open the Workbook to Password Protect
First, open the specific Excel workbook file you want to password protect.
This can be an existing workbook you created, a new blank workbook, or an Excel template file.
Make sure you save the workbook after opening it. We need to save the password protection to the file itself.
If you have multiple workbooks to password protect, you’ll need to repeat the following steps for each file.
Step 2: Access the Protect Workbook Options
Here’s how to access the workbook protection options:
- Go to the File tab and select Info
- On the right side, click the Protect Workbook button
This opens the protection configuration screen where we can set up the workbook password.
Alternatively, you can press Ctrl + Shift + G as a handy keyboard shortcut to launch Protect Workbook directly.
Step 3: Set a Strong Workbook Password
Here comes the fun part – setting your top secret workbook password!
When the Protect Workbook screen appears:
- Check the box for Encrypt with Password
- Type your chosen password into the text box
- Click OK
Some tips for choosing a strong workbook password:
- Use at least 8 characters
- Include a mix of upper/lower case letters, numbers and symbols
- Avoid obvious passwords like “Password123”
- Don’t use personal info like birthdays or pet names
- Try a password generator site if you need inspiration
Make sure it’s a password you’ll actually remember – or securely record it somewhere. If you forget the password later, Microsoft can’t recover or reset it.
Step 4: Confirm the Workbook Password
After setting the initial password, Excel will prompt you to re-enter it to confirm.
Type the same password again in the confirmation box and click OK.
That’s it – your Excel workbook is now password protected!
Open the file again and you will be prompted to enter the password to view or edit the contents. Nice work securing your data!
Step 5: Test Opening the Protected Workbook
Before moving on, it’s a good idea to quickly test that your workbook password is functioning correctly.
Close the password protected Excel file and re-open it from your hard drive or Sharepoint folder.
You should be greeted by the Unprotect Workbook screen asking you to enter your password.
Type the password and click OK to ensure you can open the file as expected. Don’t get yourself locked out!
If for some reason the password doesn’t work, jump back into Step 3 to reset it.
Locking Individual Excel Worksheets
In some cases, you may want to password protect just certain sensitive worksheets within a workbook.
For example, locking the sheet with employee payroll data but leaving other tabs open.
Here are the steps to individually password protect Excel worksheets:
- Right-click on the sheet name/tab of the worksheet
- Select Protect Sheet from the menu
- In the pop-up, type a password and click OK
This will lock the entire selected worksheet. But you can optionally configure it to allow editing for specific unlocked cells, ranges or columns first before protecting it.
The steps above can be repeated to password protect multiple important worksheets in a workbook.
Complement With Digital Signatures
For an added layer of security on top of a password, you can also digitally sign your Excel workbooks.
A digital signature acts like an electronic fingerprint to:
- Prove the workbook originated from you
- Detect if the file was modified after signing
- Display your organization’s name for authenticity
Enabling this makes your Excel files even more tamper-proof.
Here’s how to quickly add a digital signature in Excel:
- Go to File > Options > Trust Center
- Click Trust Center Settings button
- Select Digital Signatures from left menu
- Click Add to insert your signature
Remove or Change Passwords Easily
Made a mistake with your workbook password or want to remove protection later? No worries – you can edit or delete the password easily.
To remove the password completely:
- Open the protected Excel file
- Enter password when prompted
- Go to File > Info > Protect Workbook > Encrypt with Password
- Delete the current password and leave blank
- Click OK
To change the password:
- Open the protected Excel file
- Enter current password when prompted
- Follow steps above to reset the password
- Type the new password instead
Passwords can be a bit finicky in Excel, so this may take a couple tries. But re-setting them is doable when needed.
Troubleshoot Password Protection Issues
Hopefully you don’t run into any problems, but password protection in Excel isn’t always perfect.
Here are some common issues and fixes:
-
Forgot the password – Unfortunately, passwords can’t be recovered or reset by Microsoft. You’ll need to crack the password with a third party tool. Prevention is best – record passwords securely or use a password manager.
-
Workbook opens without asking for password – Double check that the file is saved in an Excel format like .XLSX rather than CSV. Other formats don’t support password protection. Re-save as Excel.
-
Worksheet password not working – The steps to password protect worksheets are a little different than protecting the full workbook. Carefully follow the worksheet specific steps above.
-
Password works on one machine but not another – Passwords are sometimes tied to the original machine. Try resetting the password while opening the file on the other device instead.
-
Getting error messages about password – If Excel gives you strange errors about the password being incorrect, try saving a fresh copy of the file and applying a new password from scratch.
As you can see, passwords and file protection can get a little buggy in Excel. But with some care and troubleshooting, you can get them working properly.
Putting It All Together…
Phew, we covered a ton of ground here!
Here’s a quick recap of the key steps to password protect Excel files:
- Open the workbook and save it
- Go to File > Info > Protect Workbook
- Enter and confirm a strong password
- Click OK to save protection
- Test opening the file to verify
- Repeat for other important workbooks
- Optionally add digital signatures for security
Following the steps in this guide will take your Excel file privacy game to the next level.
You now have the power to lock down sensitive data to keep it away from unwanted eyes!
So what are you waiting for? Go forth and password protect those Excel workbooks. Your data will thank you.
Any questions on Excel file protection? Ask in the comments!
How to Protect Excel Sheet with Password | Lock Excel Sheet
How do I password-protect a file in Microsoft Excel?
This wikiHow will show you how to password-protect a file in Microsoft Excel using your Windows or Mac computer. Click “File” → “Info” → “Protect Workbook” → “Encrypt with Password”. Enter a password twice and click “OK”. To set as Read-Only, click “File” → “Info” → “Protect Workbook” → “Always Open Read-Only”.
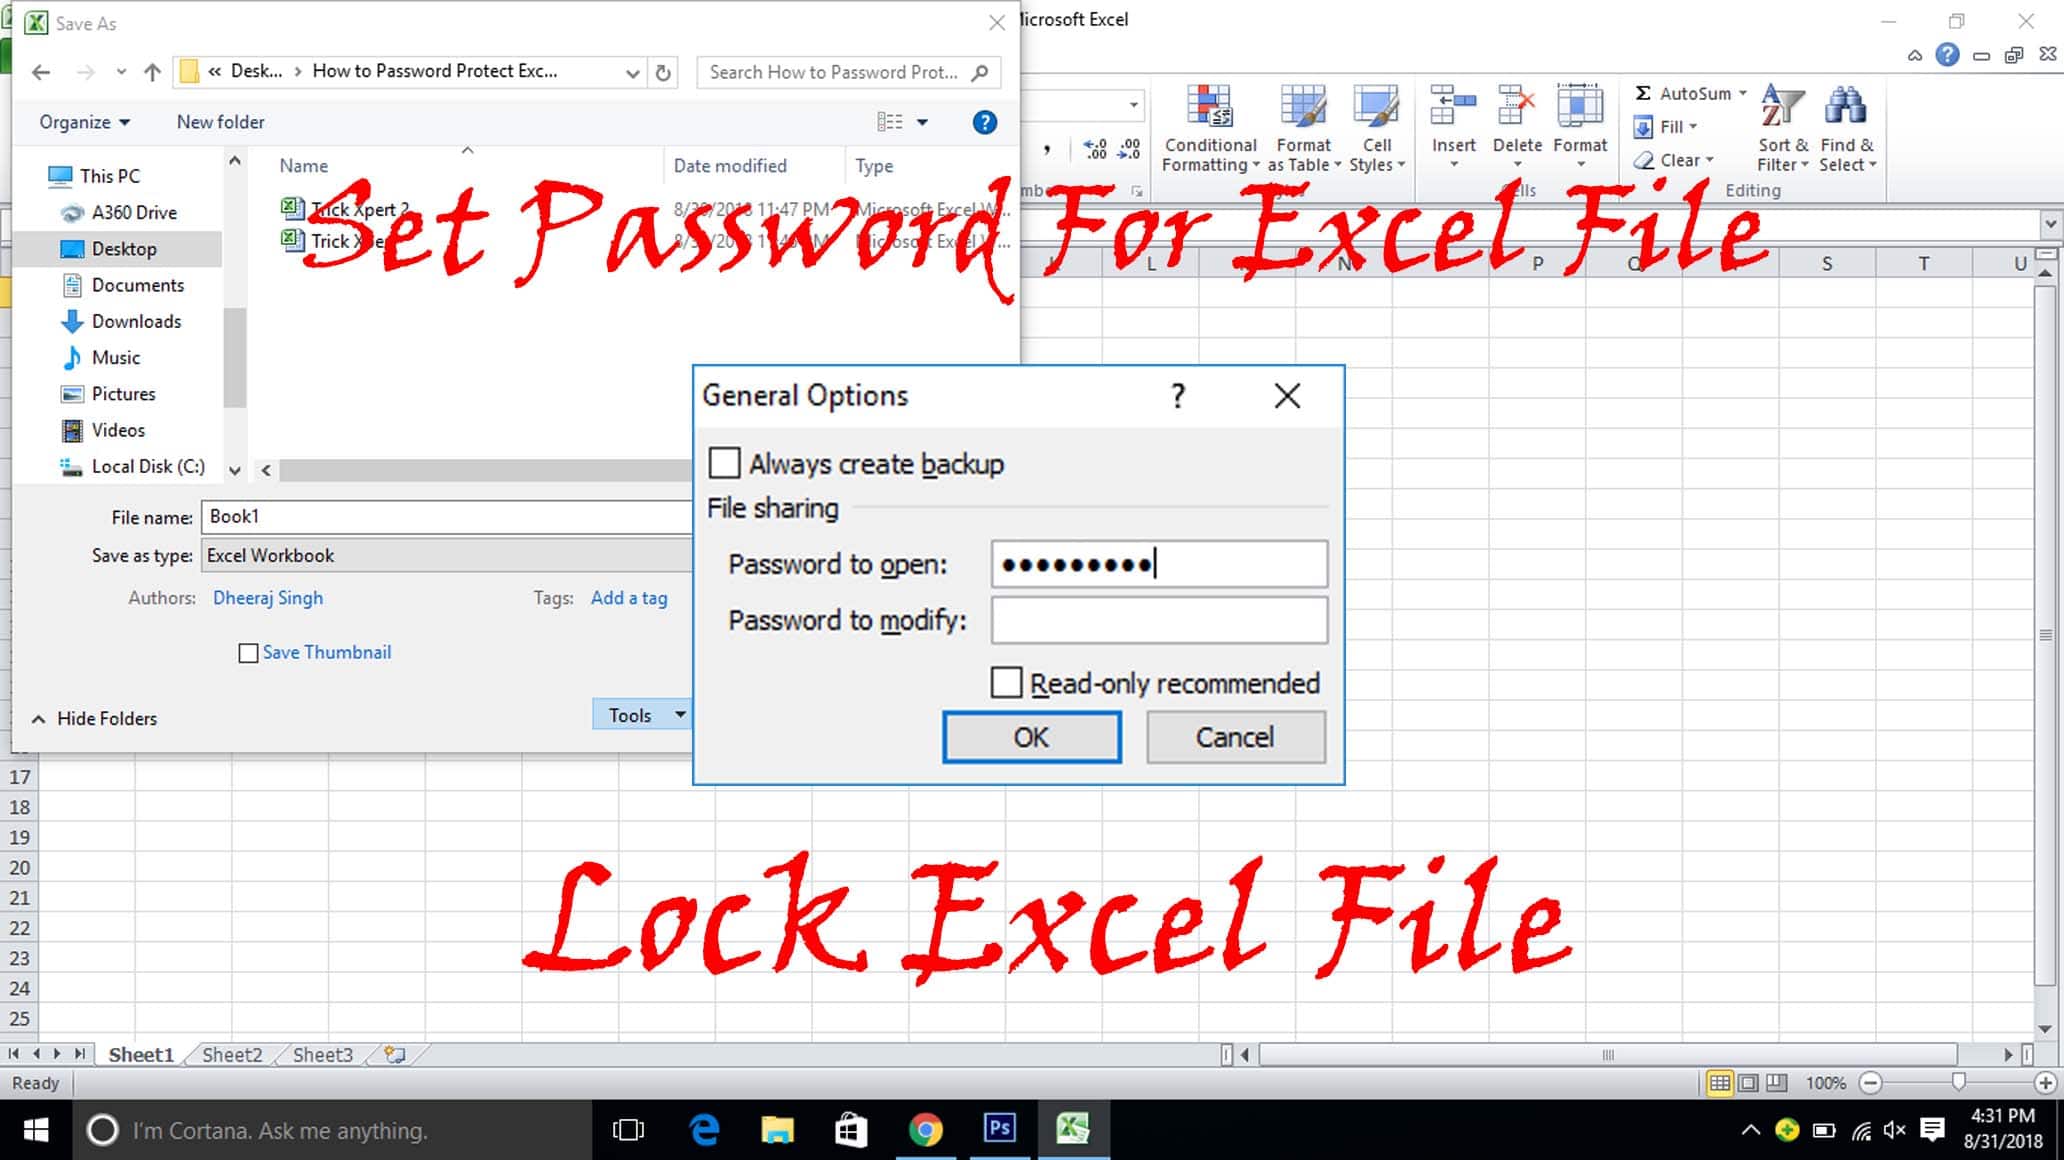
How do I protect my Excel workbook with a password?
Open the Microsoft Excel workbook that you want to protect using a password. Click on the File tab in the top-left corner of the Excel window. Click the Browse option below the Save As section on the right. The Save As dialog will pop up. Click on the Tools dropdown menu and select General Options. Password to open. Password to modify.
How do I encrypt my Excel file with a password?
The Protect Workbook user interface button is the primary option to encrypt your Excel file with a password. Find below the steps you can follow: Launch Microsoft Excel and open the file you want to protect. Click on the File tab in the top-left corner of the Excel window. In the File menu, select Info from the left menu.
What should I remember before using password protection in Excel?
Here are the things you must remember before using password protection in Excel: Microsoft Excel doesn’t allow you to recover passwords you set in your Excel files. If you forget the password, you can’t open the workbook anymore. There are Excel VBA-based scripts that allow hackers to hack an Excel file protected with a password.
